
TUNETRACE / IPHONE GUIDE
From your first recording to your own library.
Learn the full flow: start a recording, identify songs, save them to your library, and listen offline.
Record only content that iOS and the source app allow you to capture, and that you have permission to keep.
Start recording
01—06- Step 01
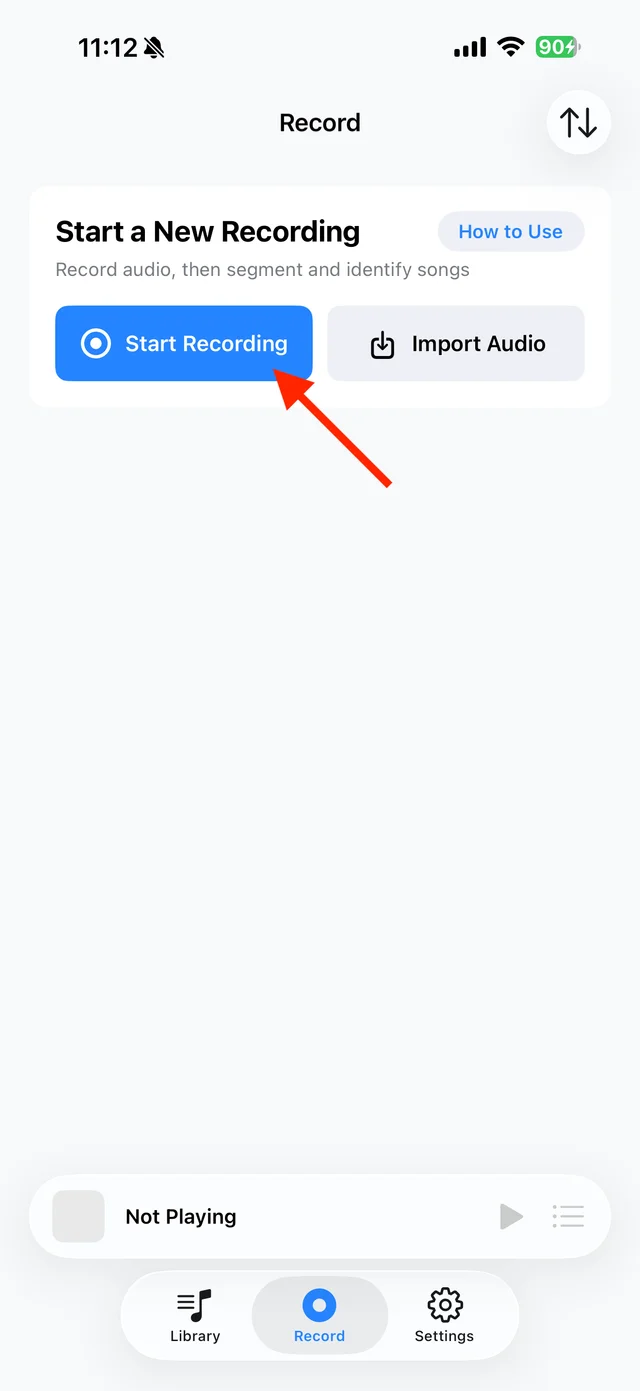
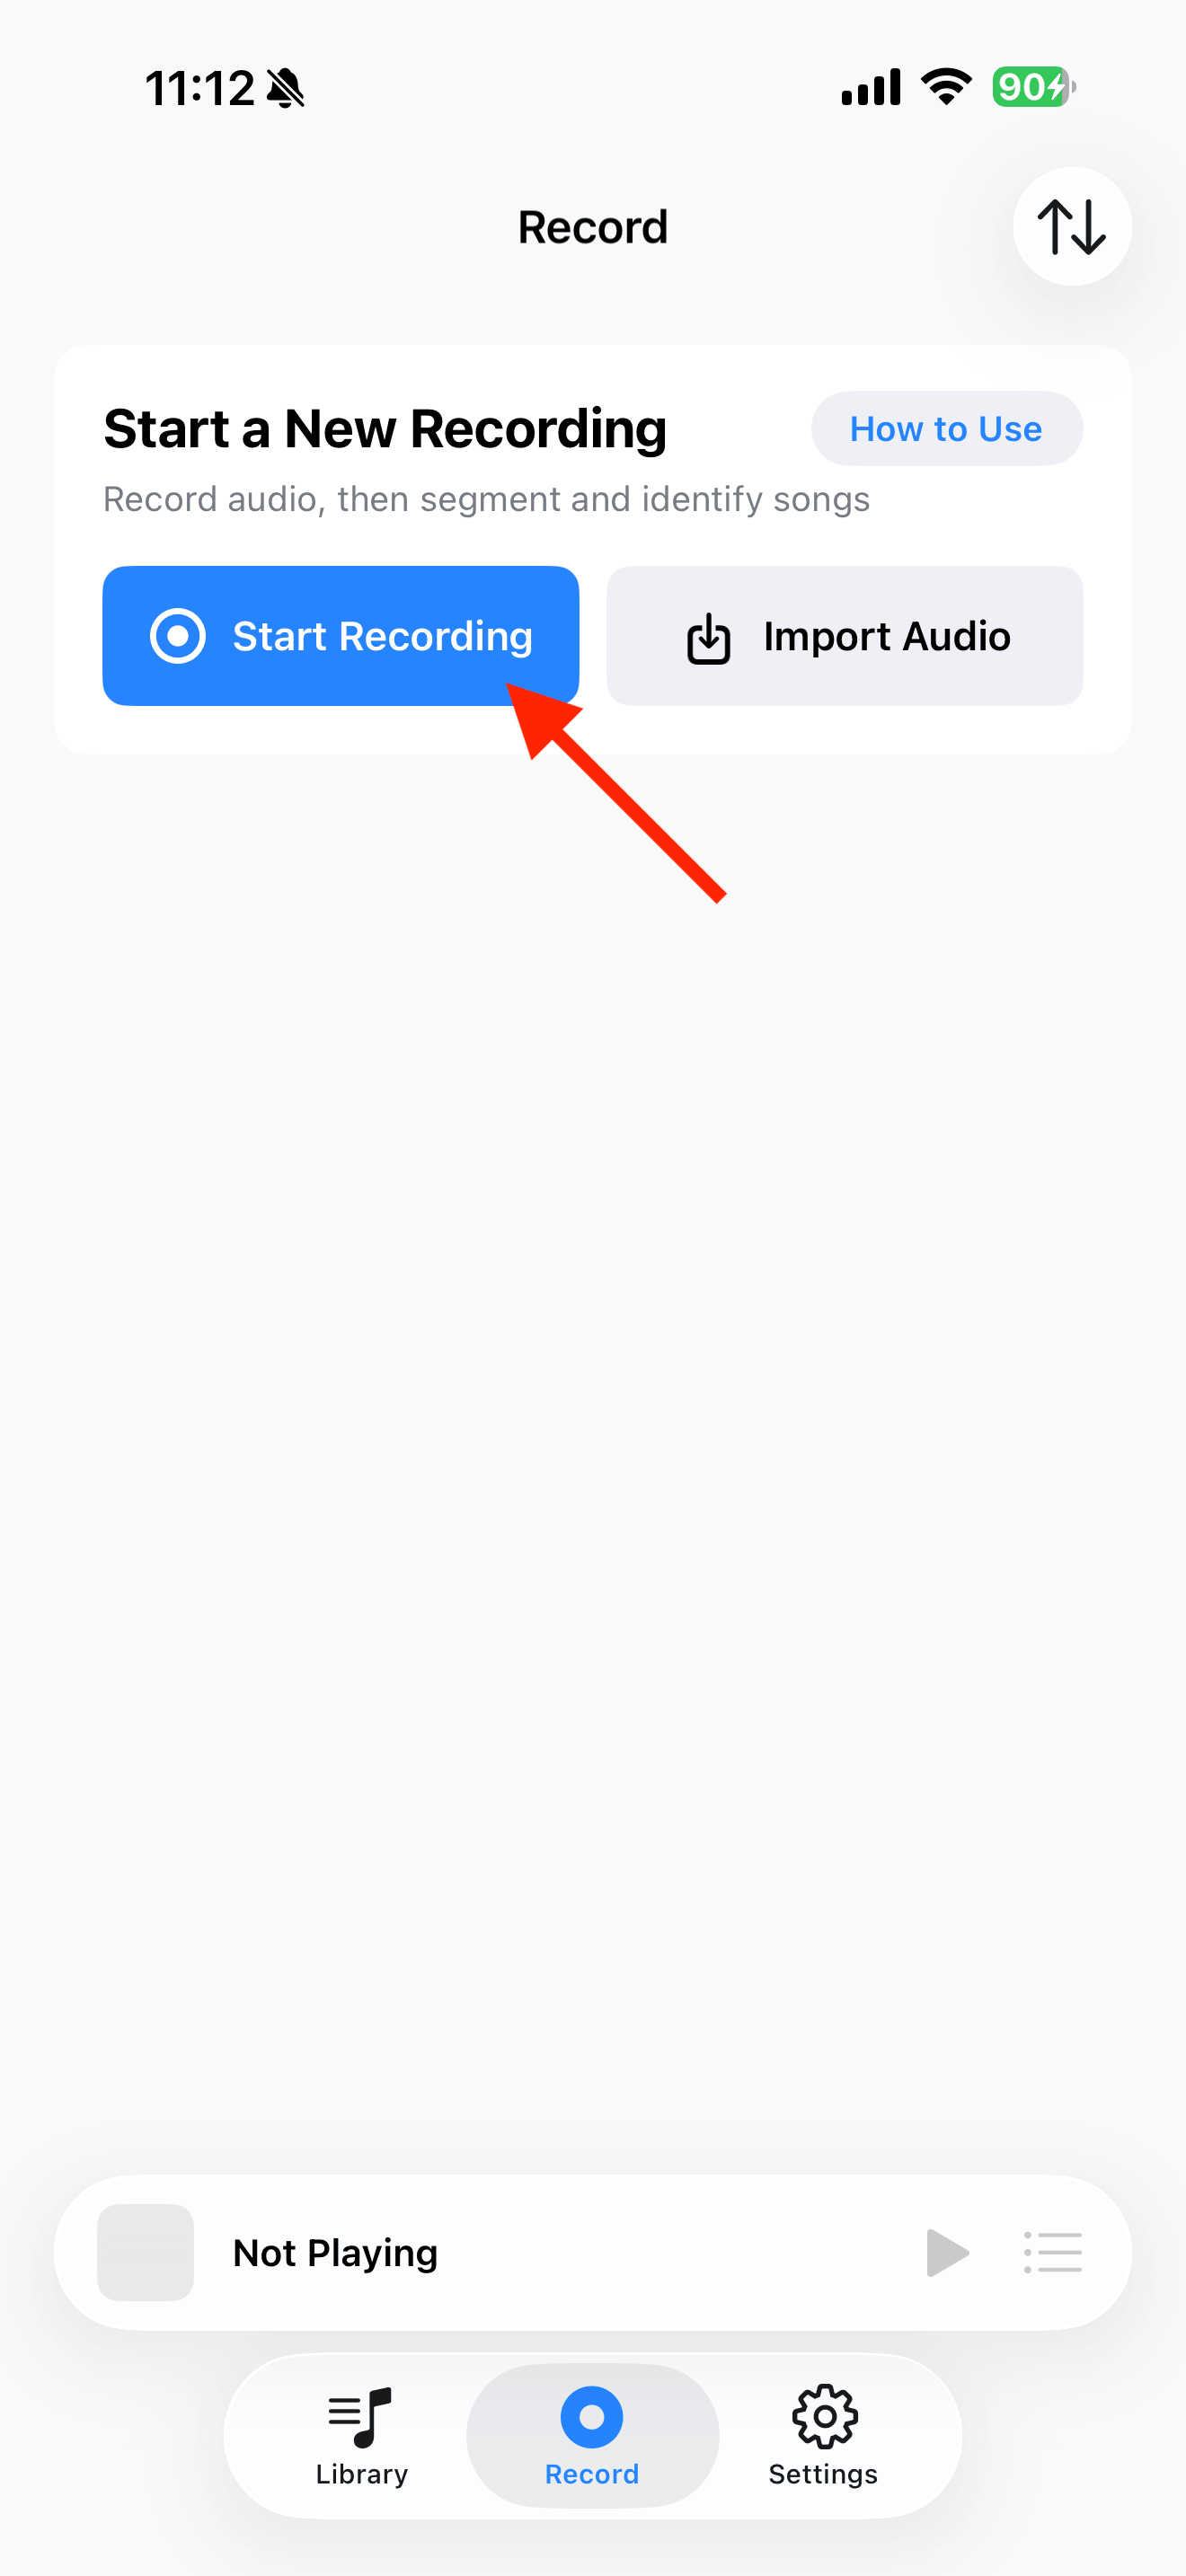
Tap Start Recording.
- Step 02
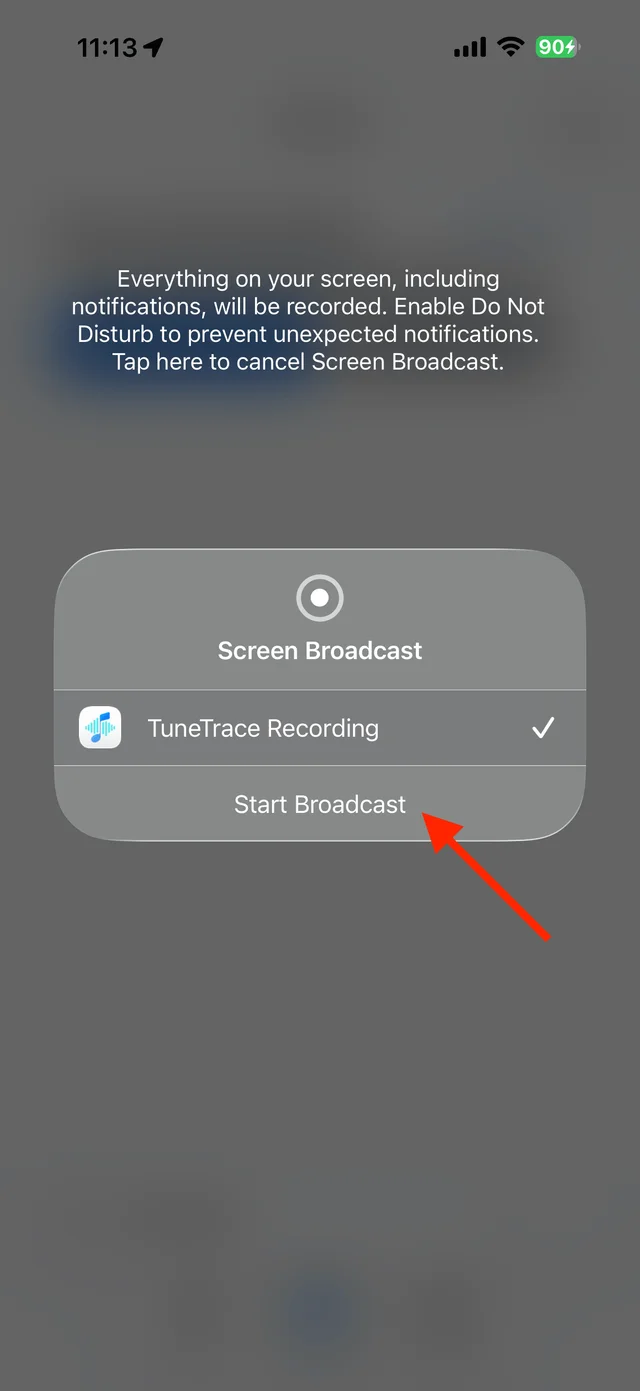
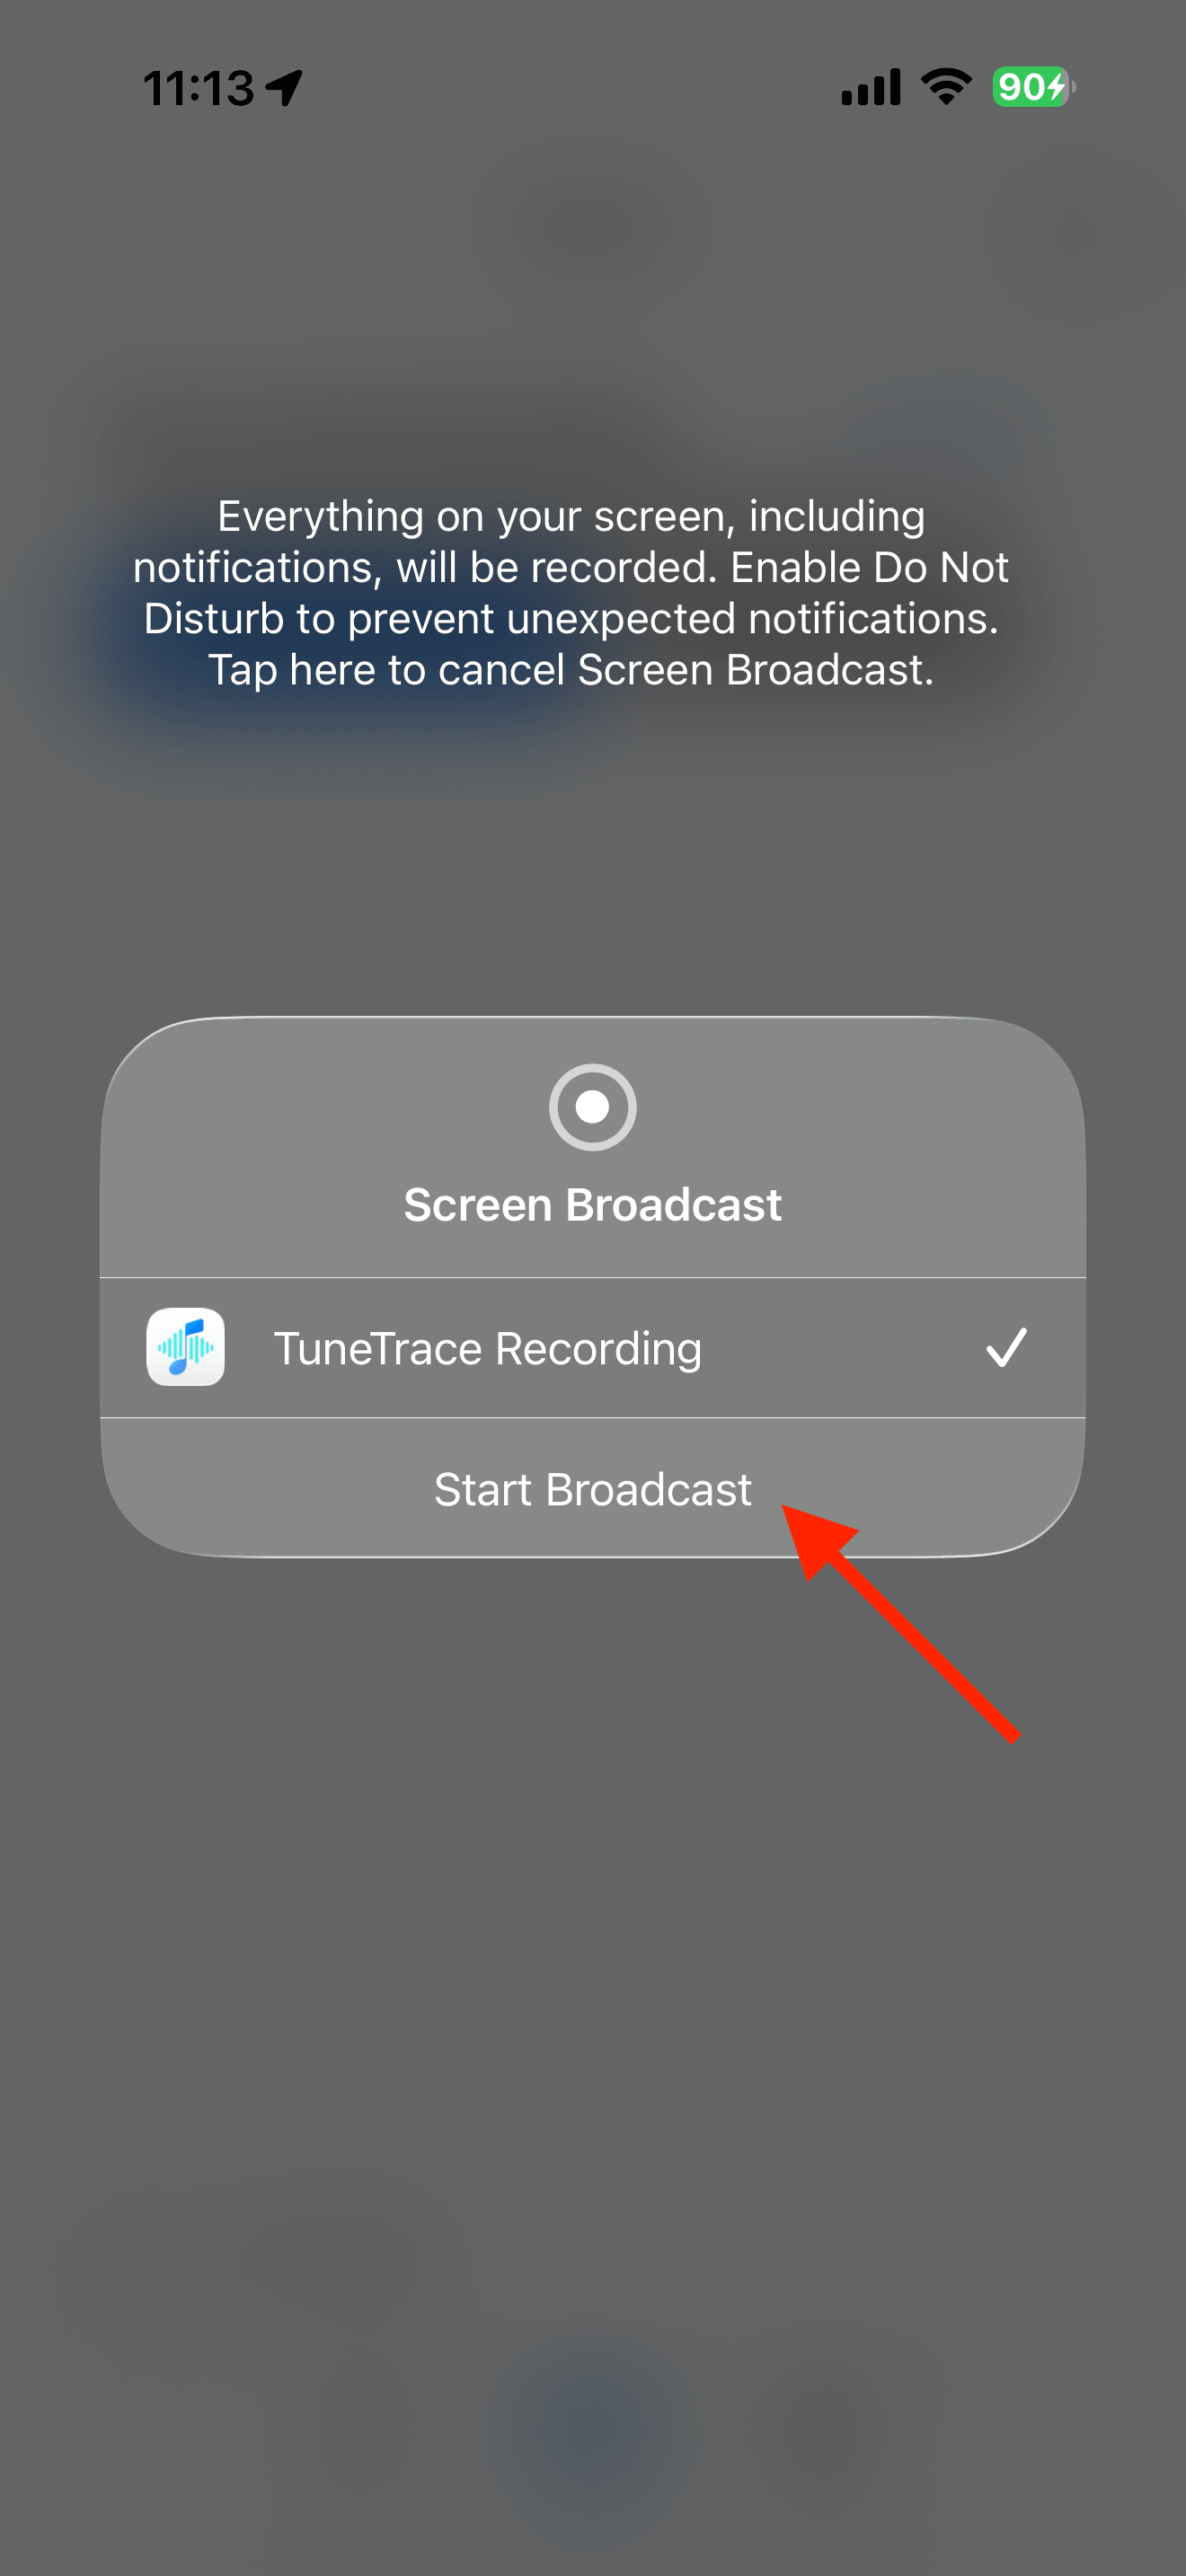
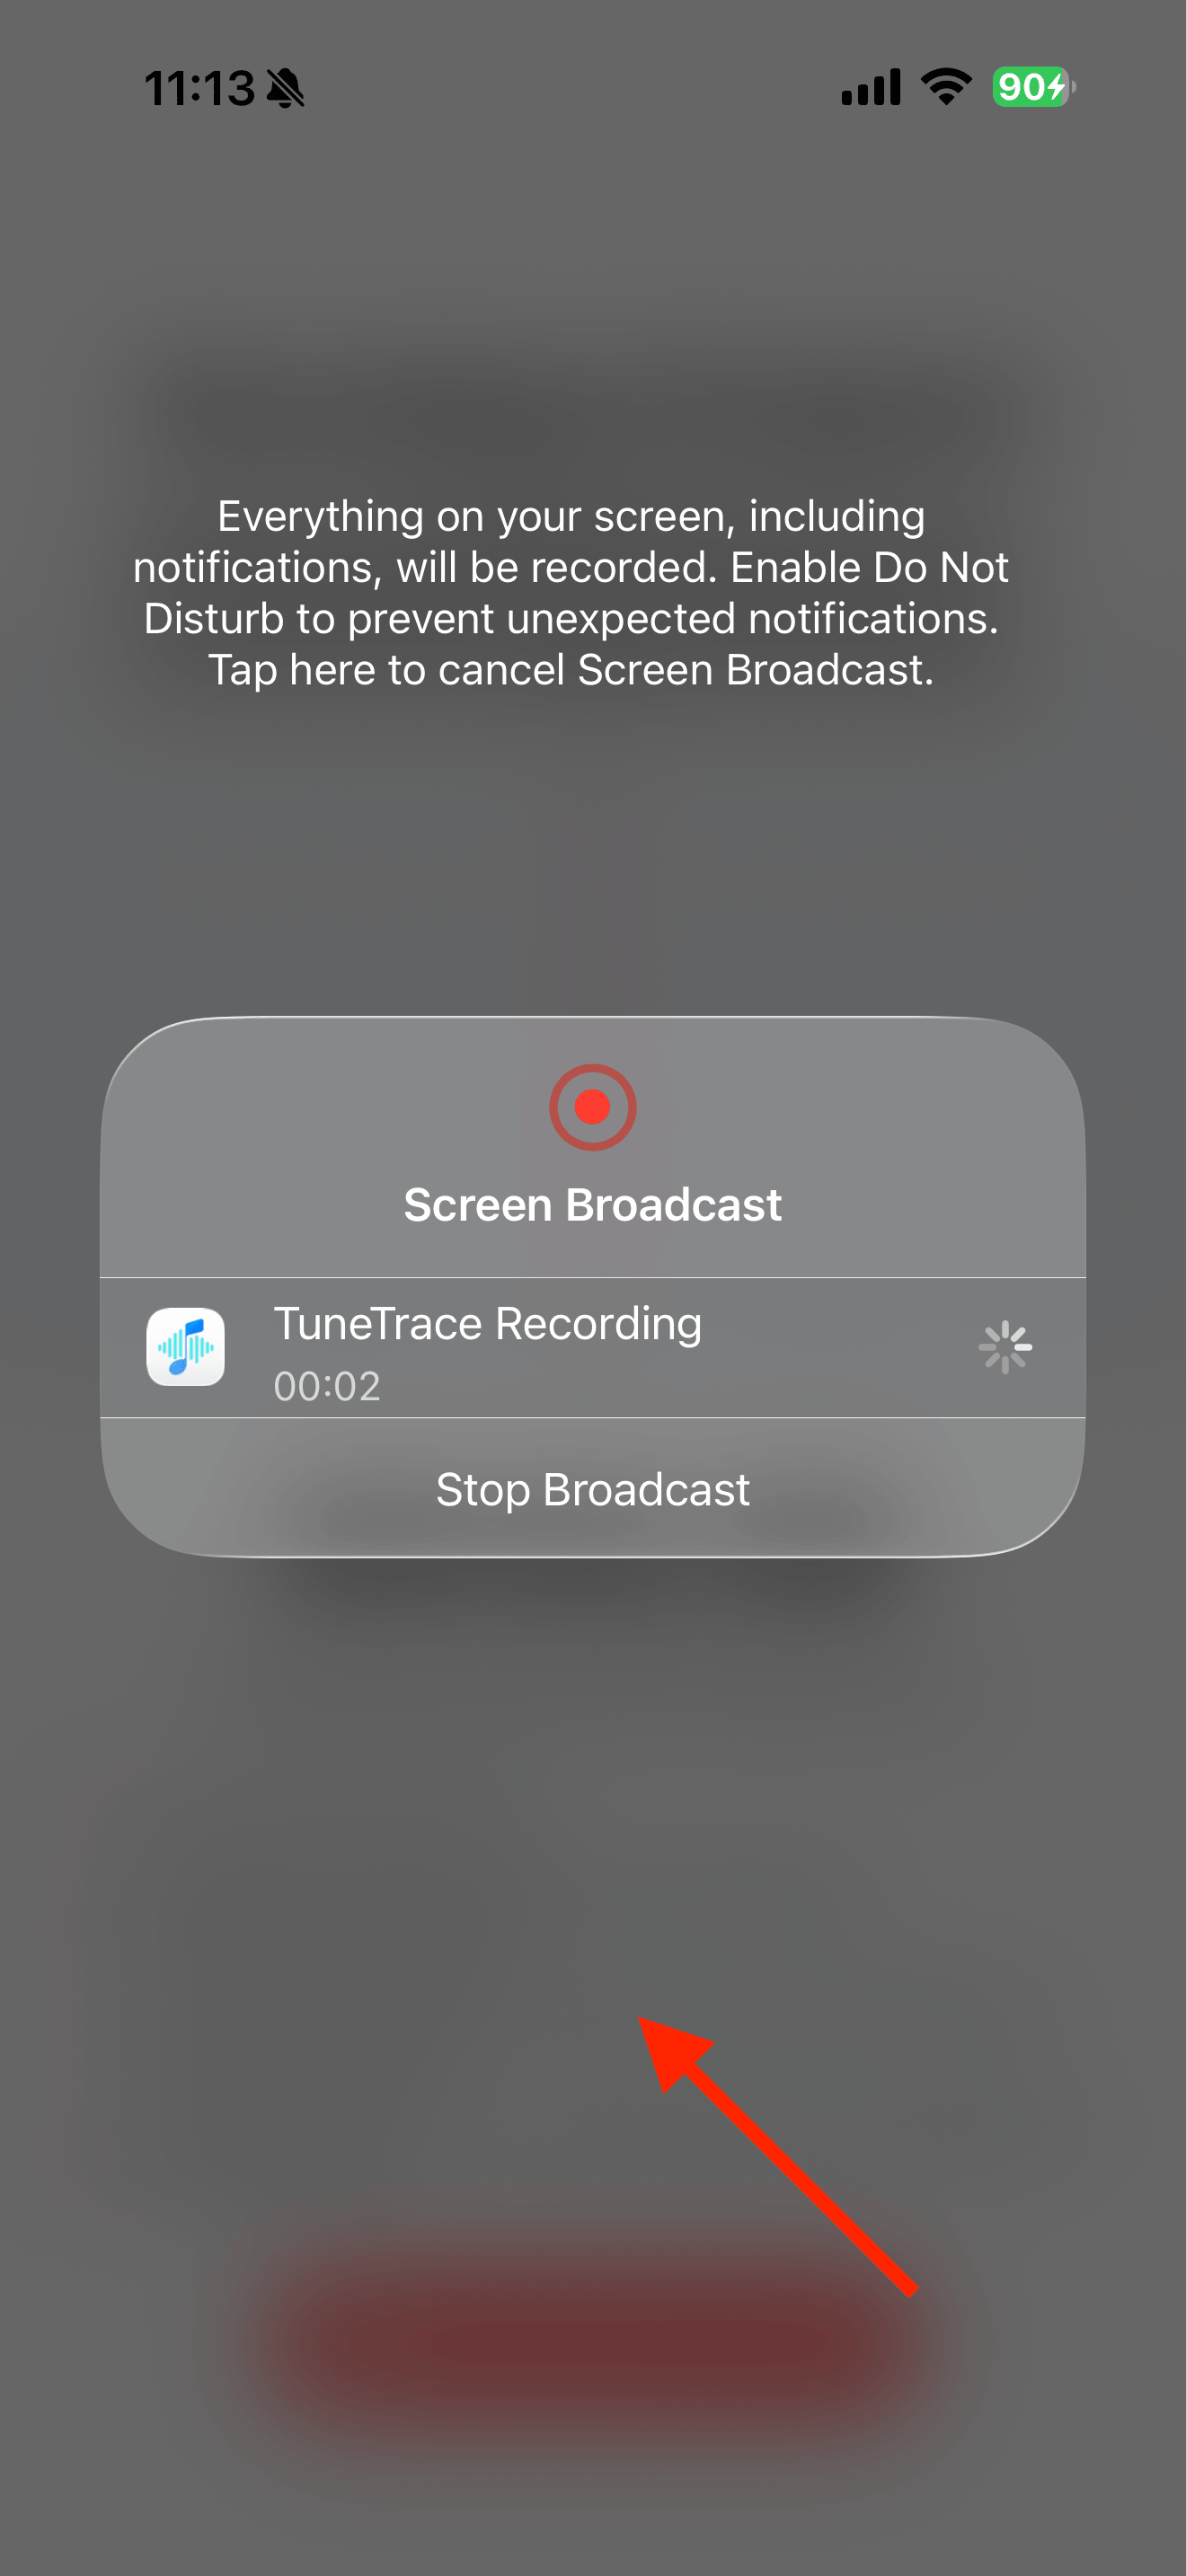
In the pop-up, tap Start Broadcast.
- Step 03
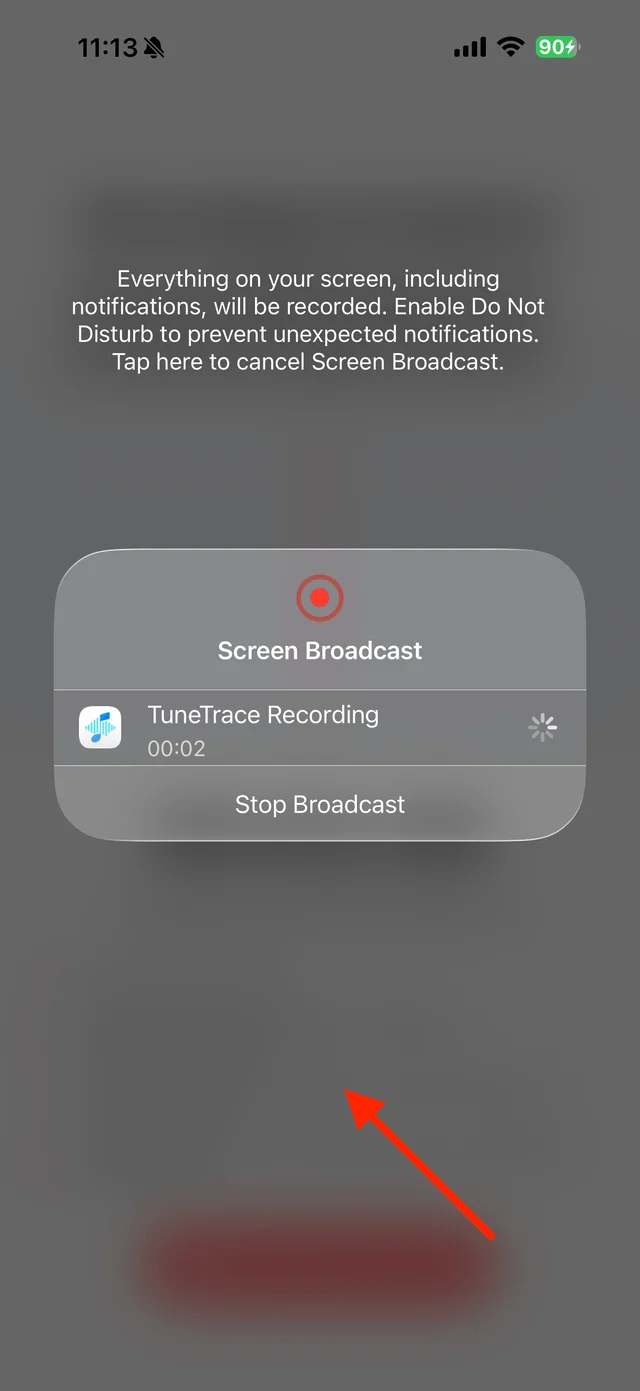
Wait a moment, then tap outside the pop-up to close it.
- Step 04
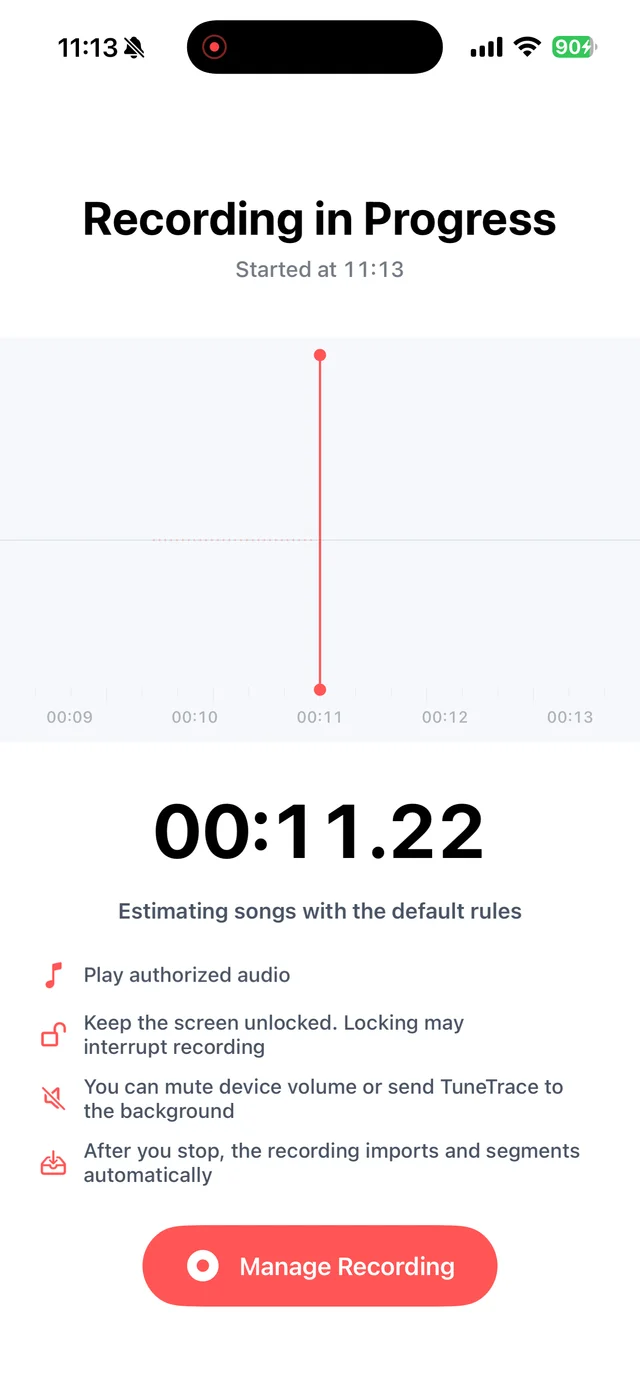
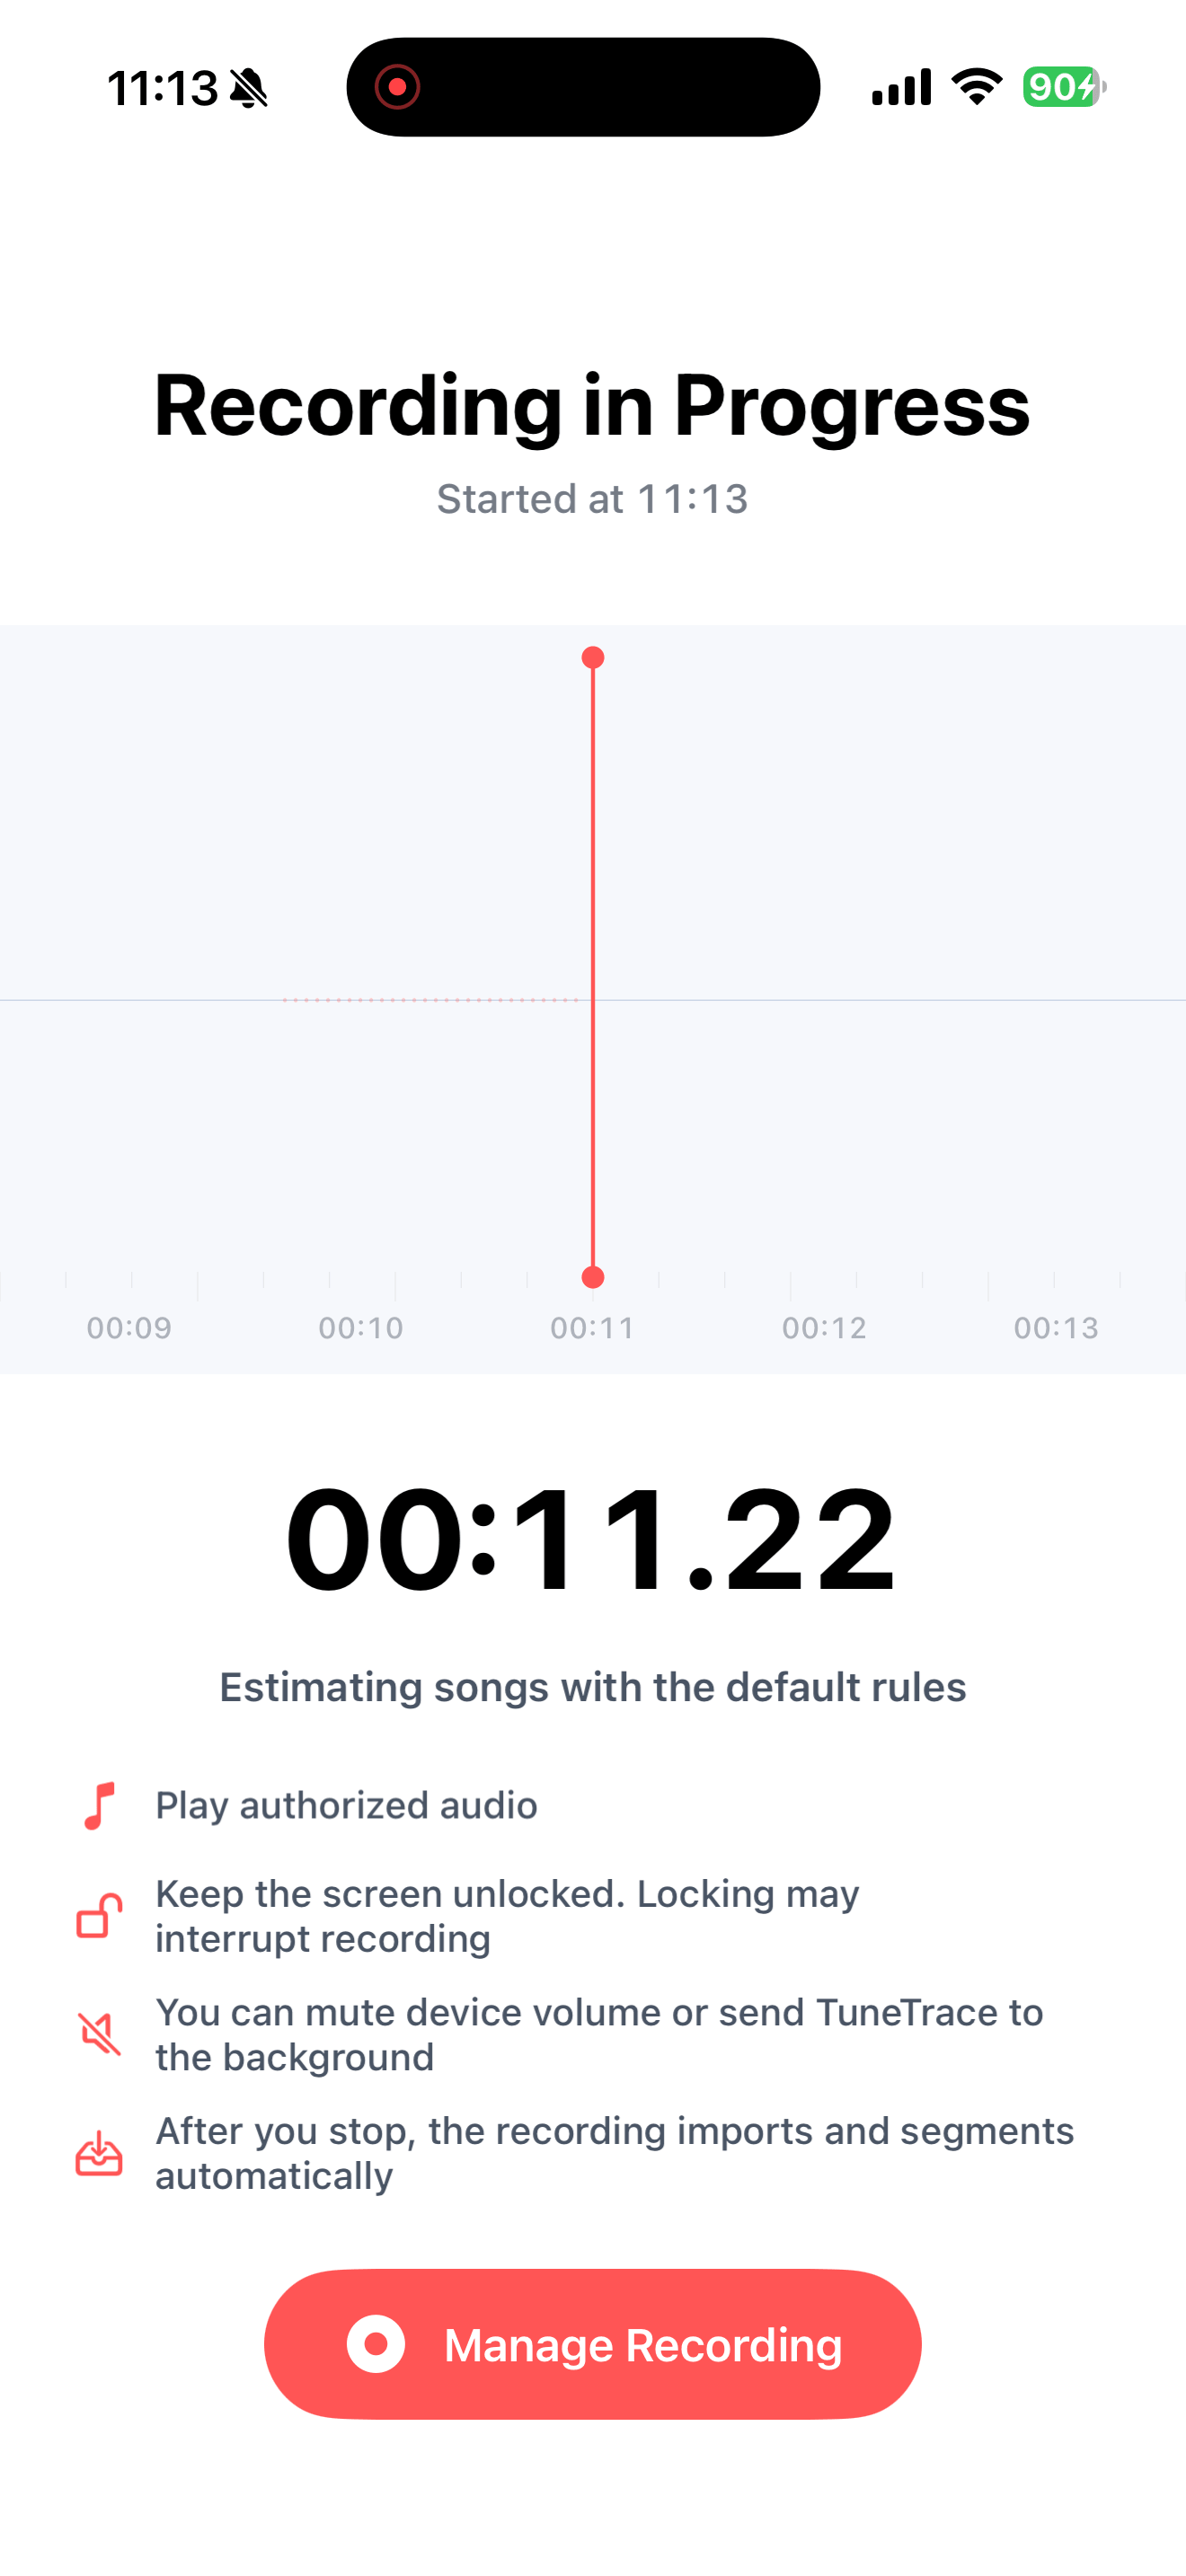
Keep your iPhone awake while TuneTrace records. You can turn the volume all the way down without affecting the recording.
- Step 05
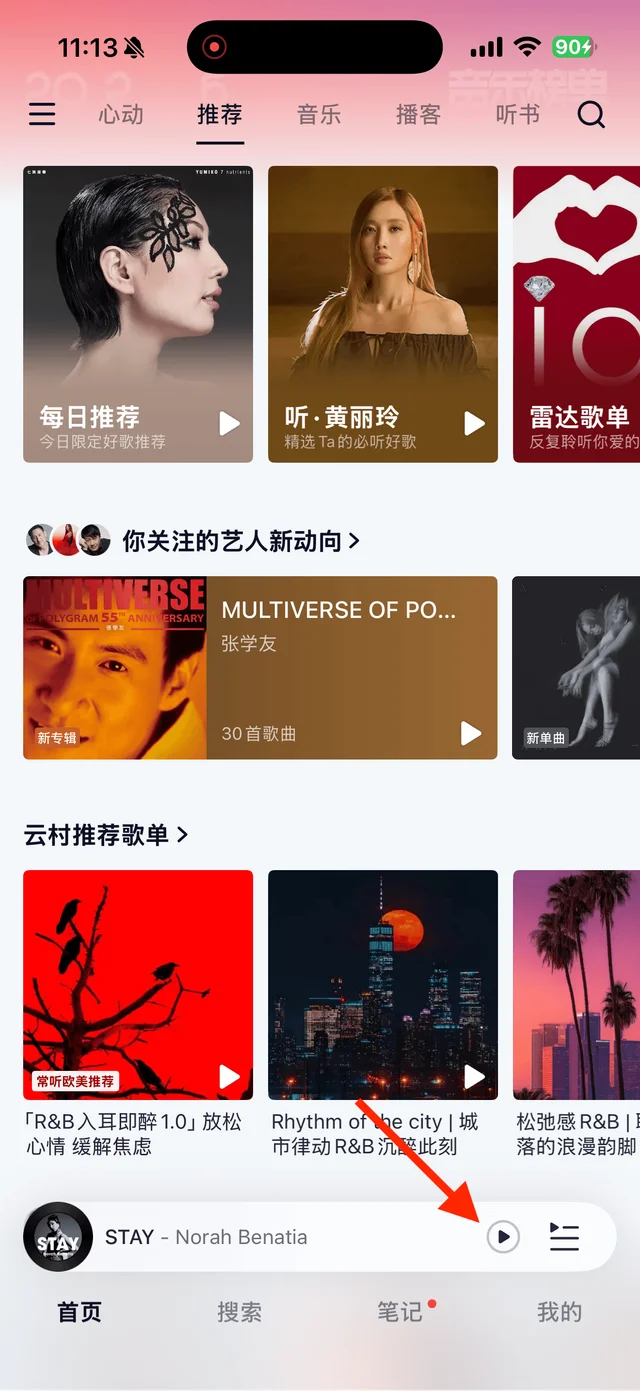
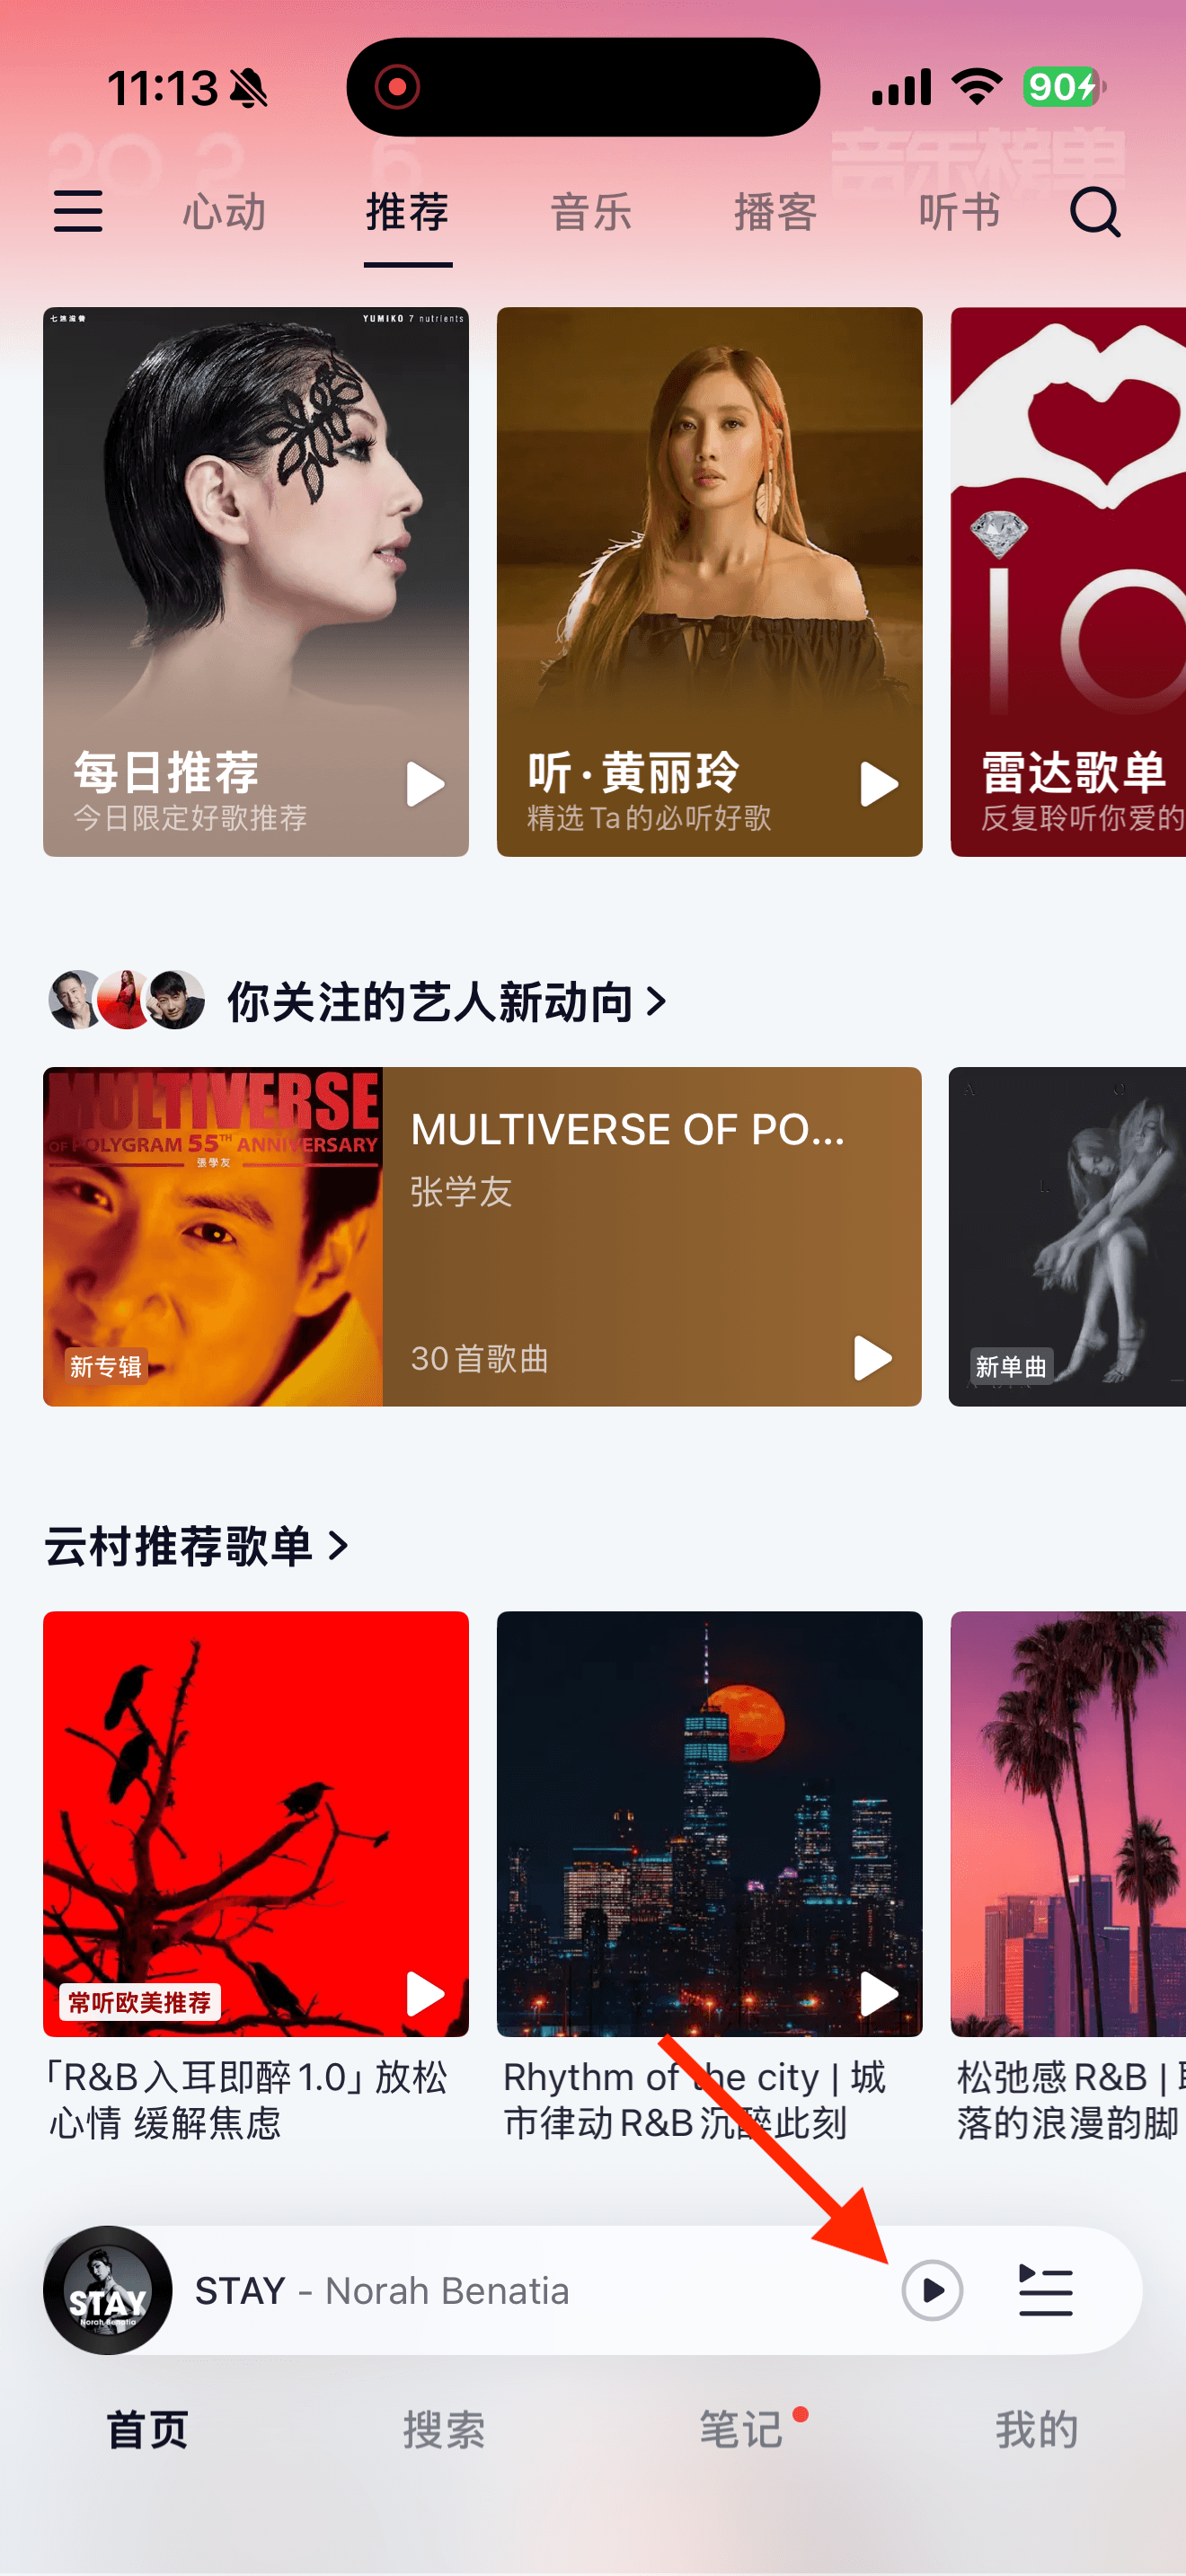
Open another music or video app and play a song, playlist, or video queue.
- Step 06
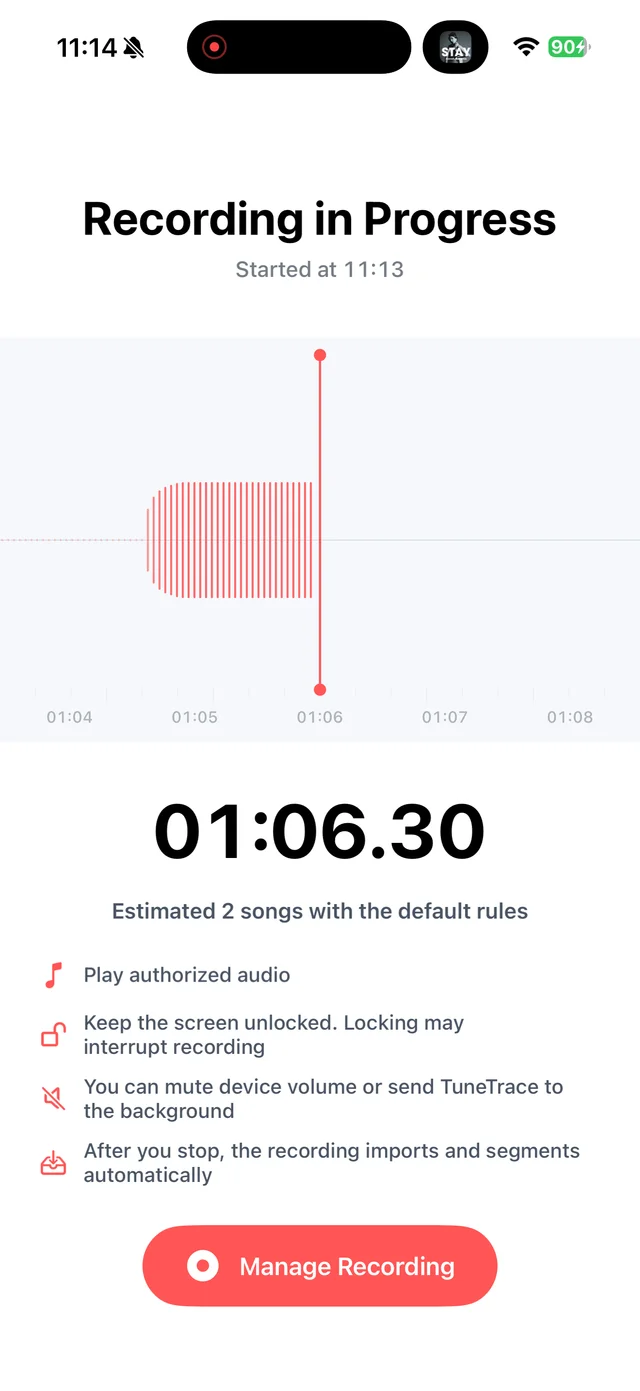
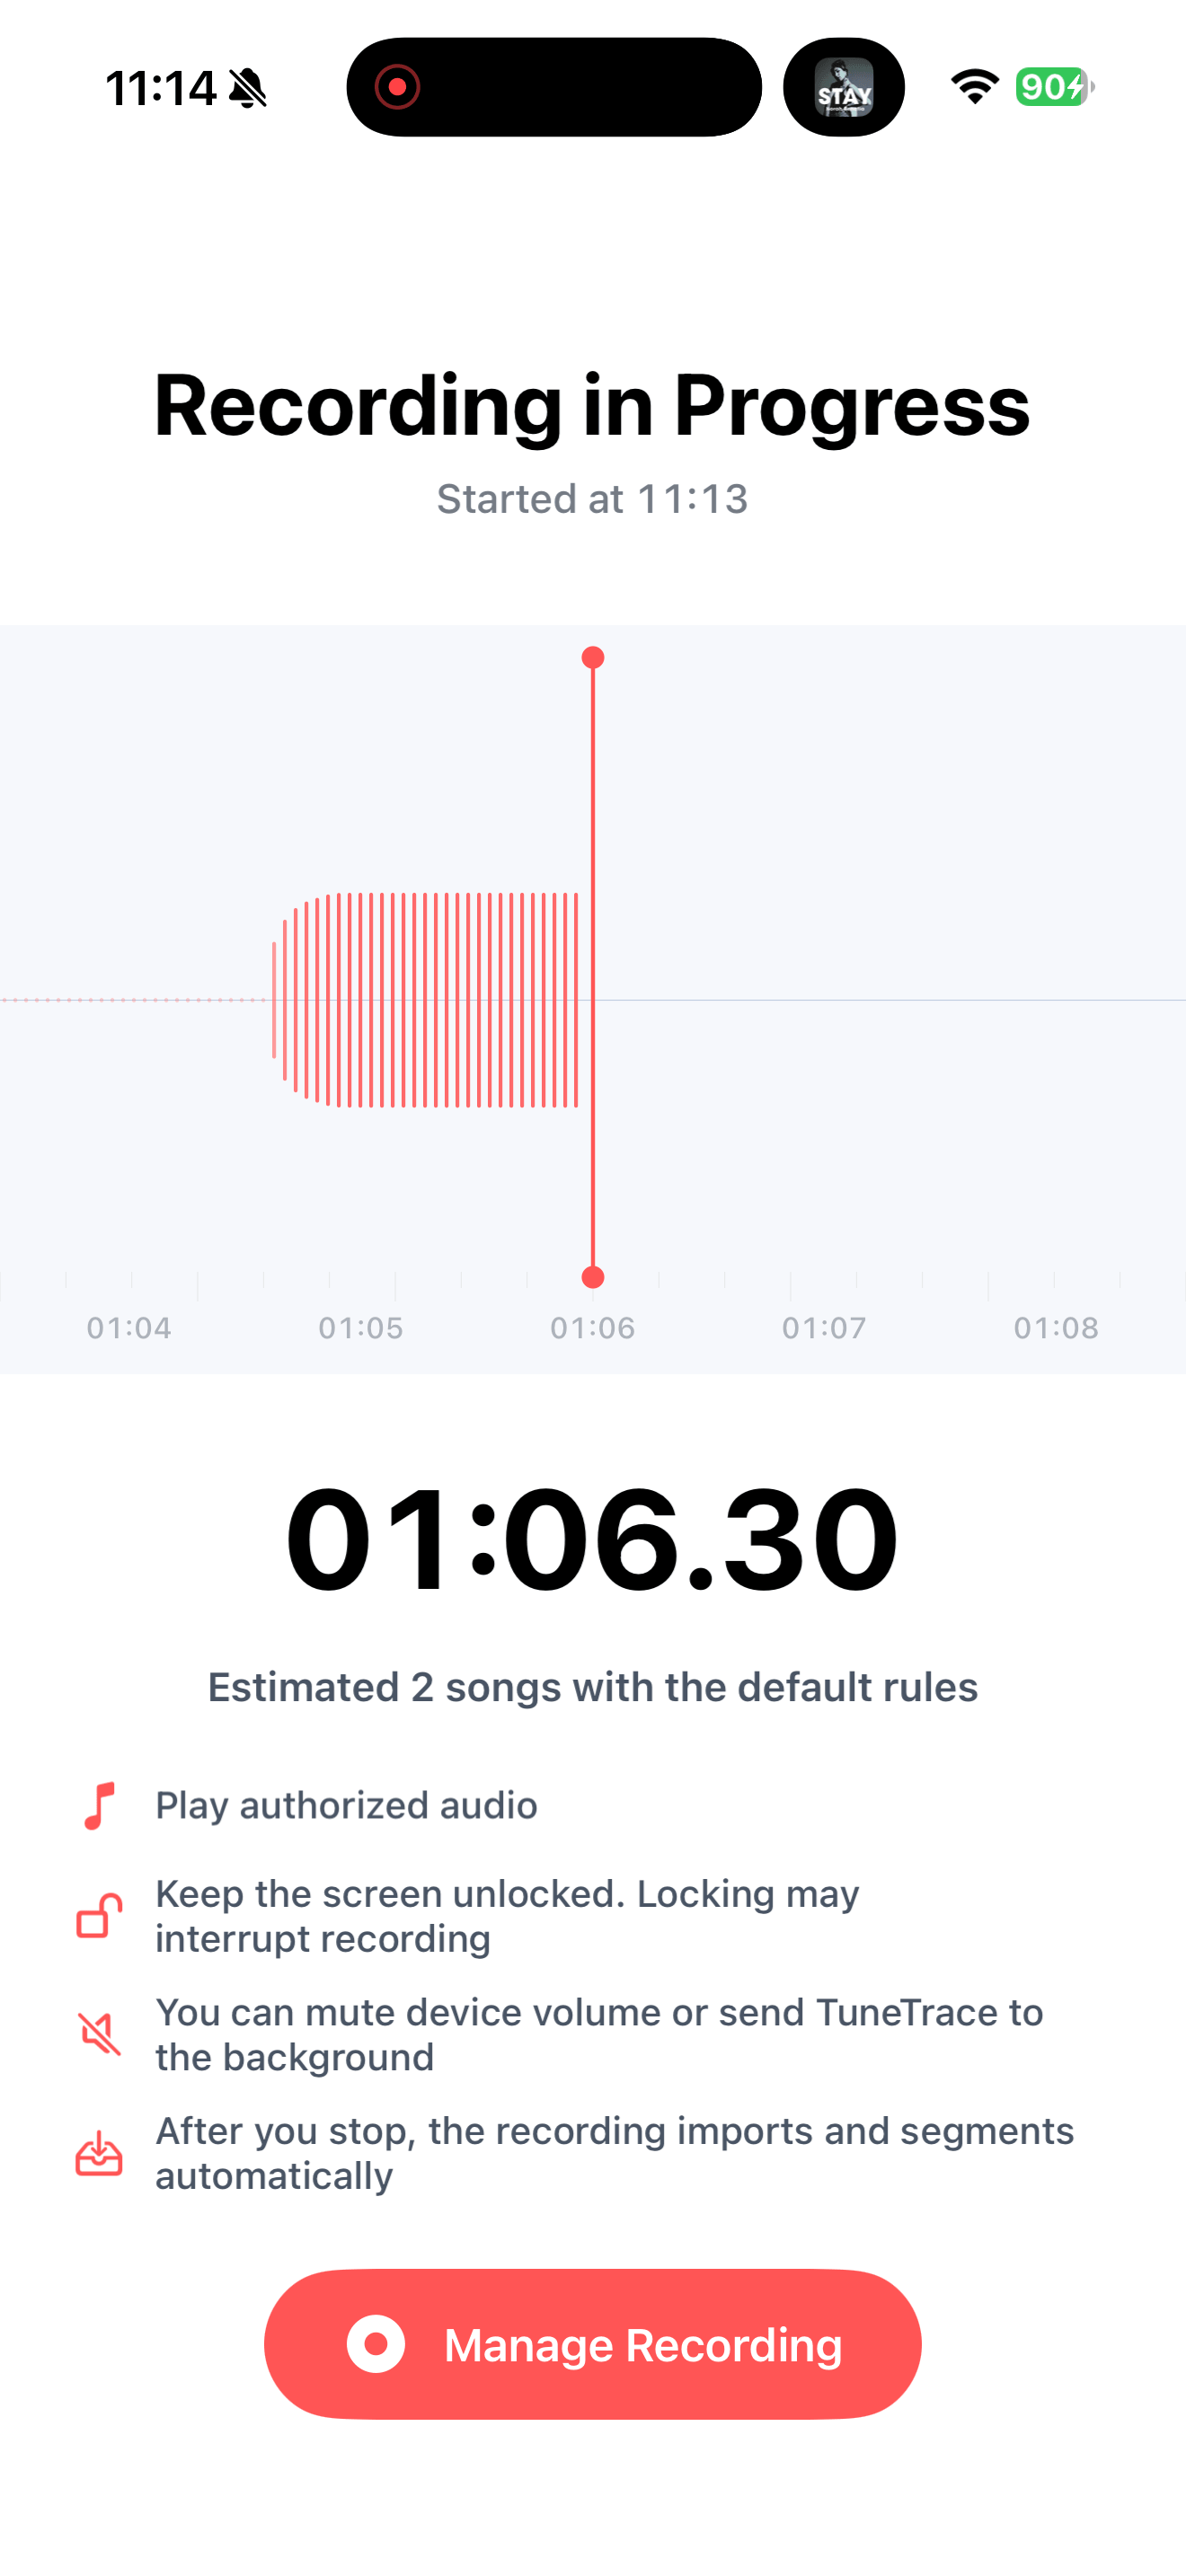
Return to TuneTrace to check that the waveform is moving. You can keep using the other app, but leave your iPhone awake. If needed, choose Never in Settings > Display & Brightness > Auto-Lock.
Finish recording
07—08- Step 07
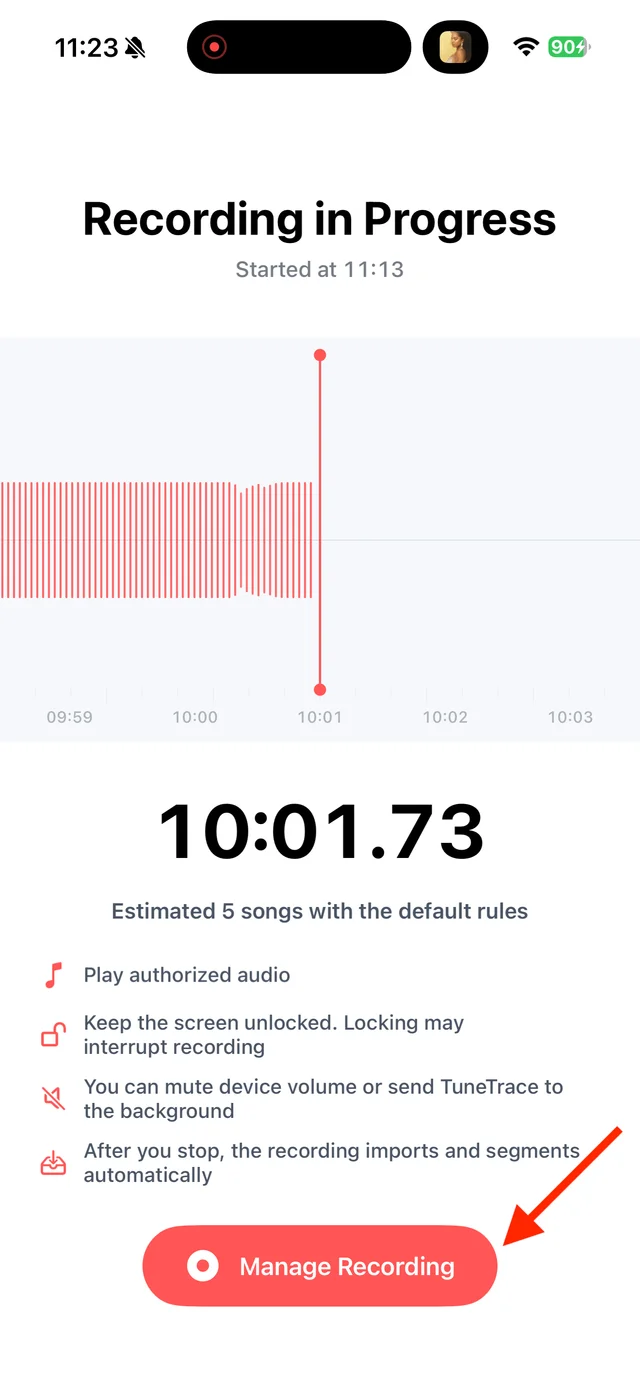
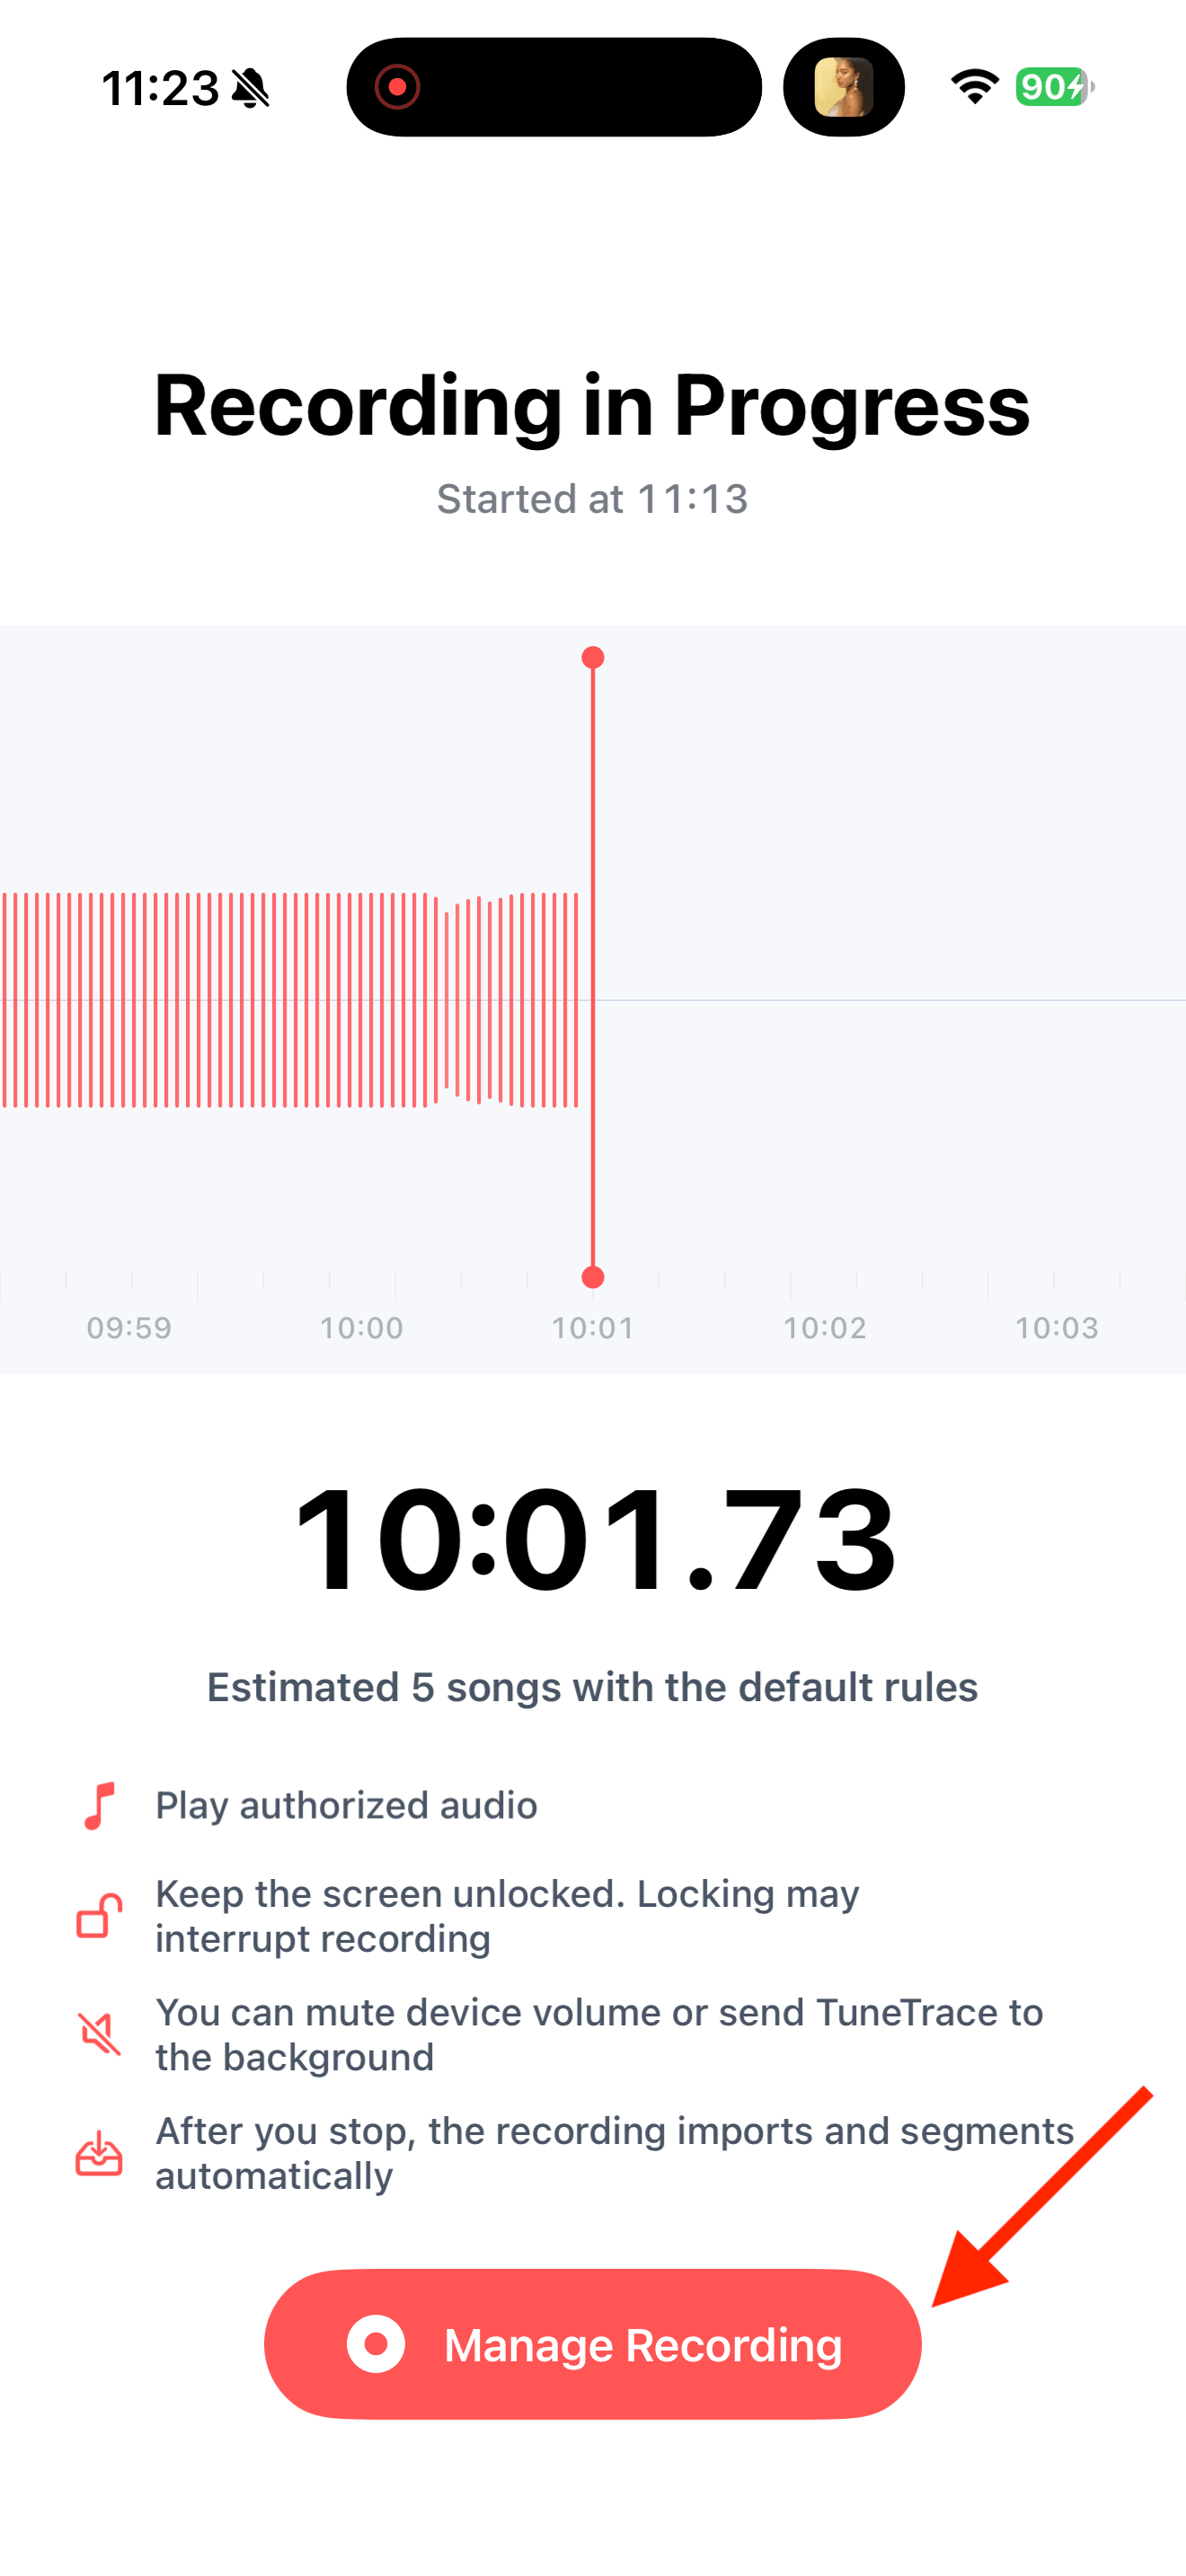
When you are done, tap Manage Recording.
- Step 08
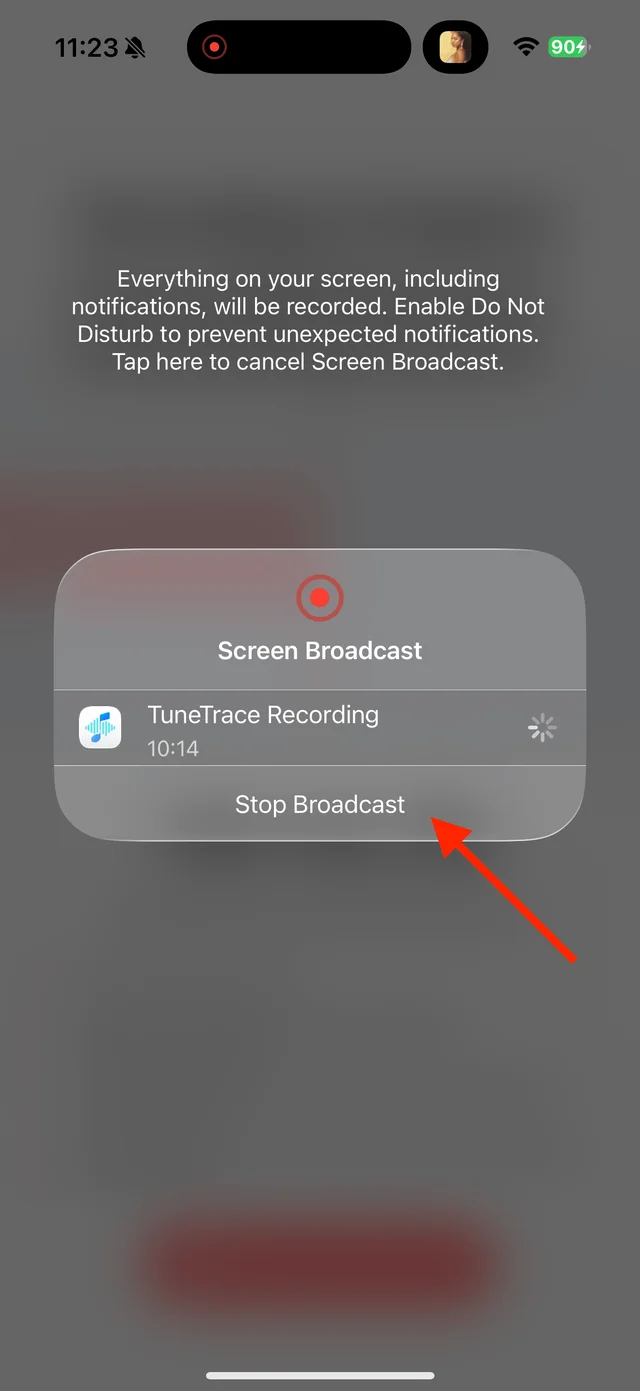
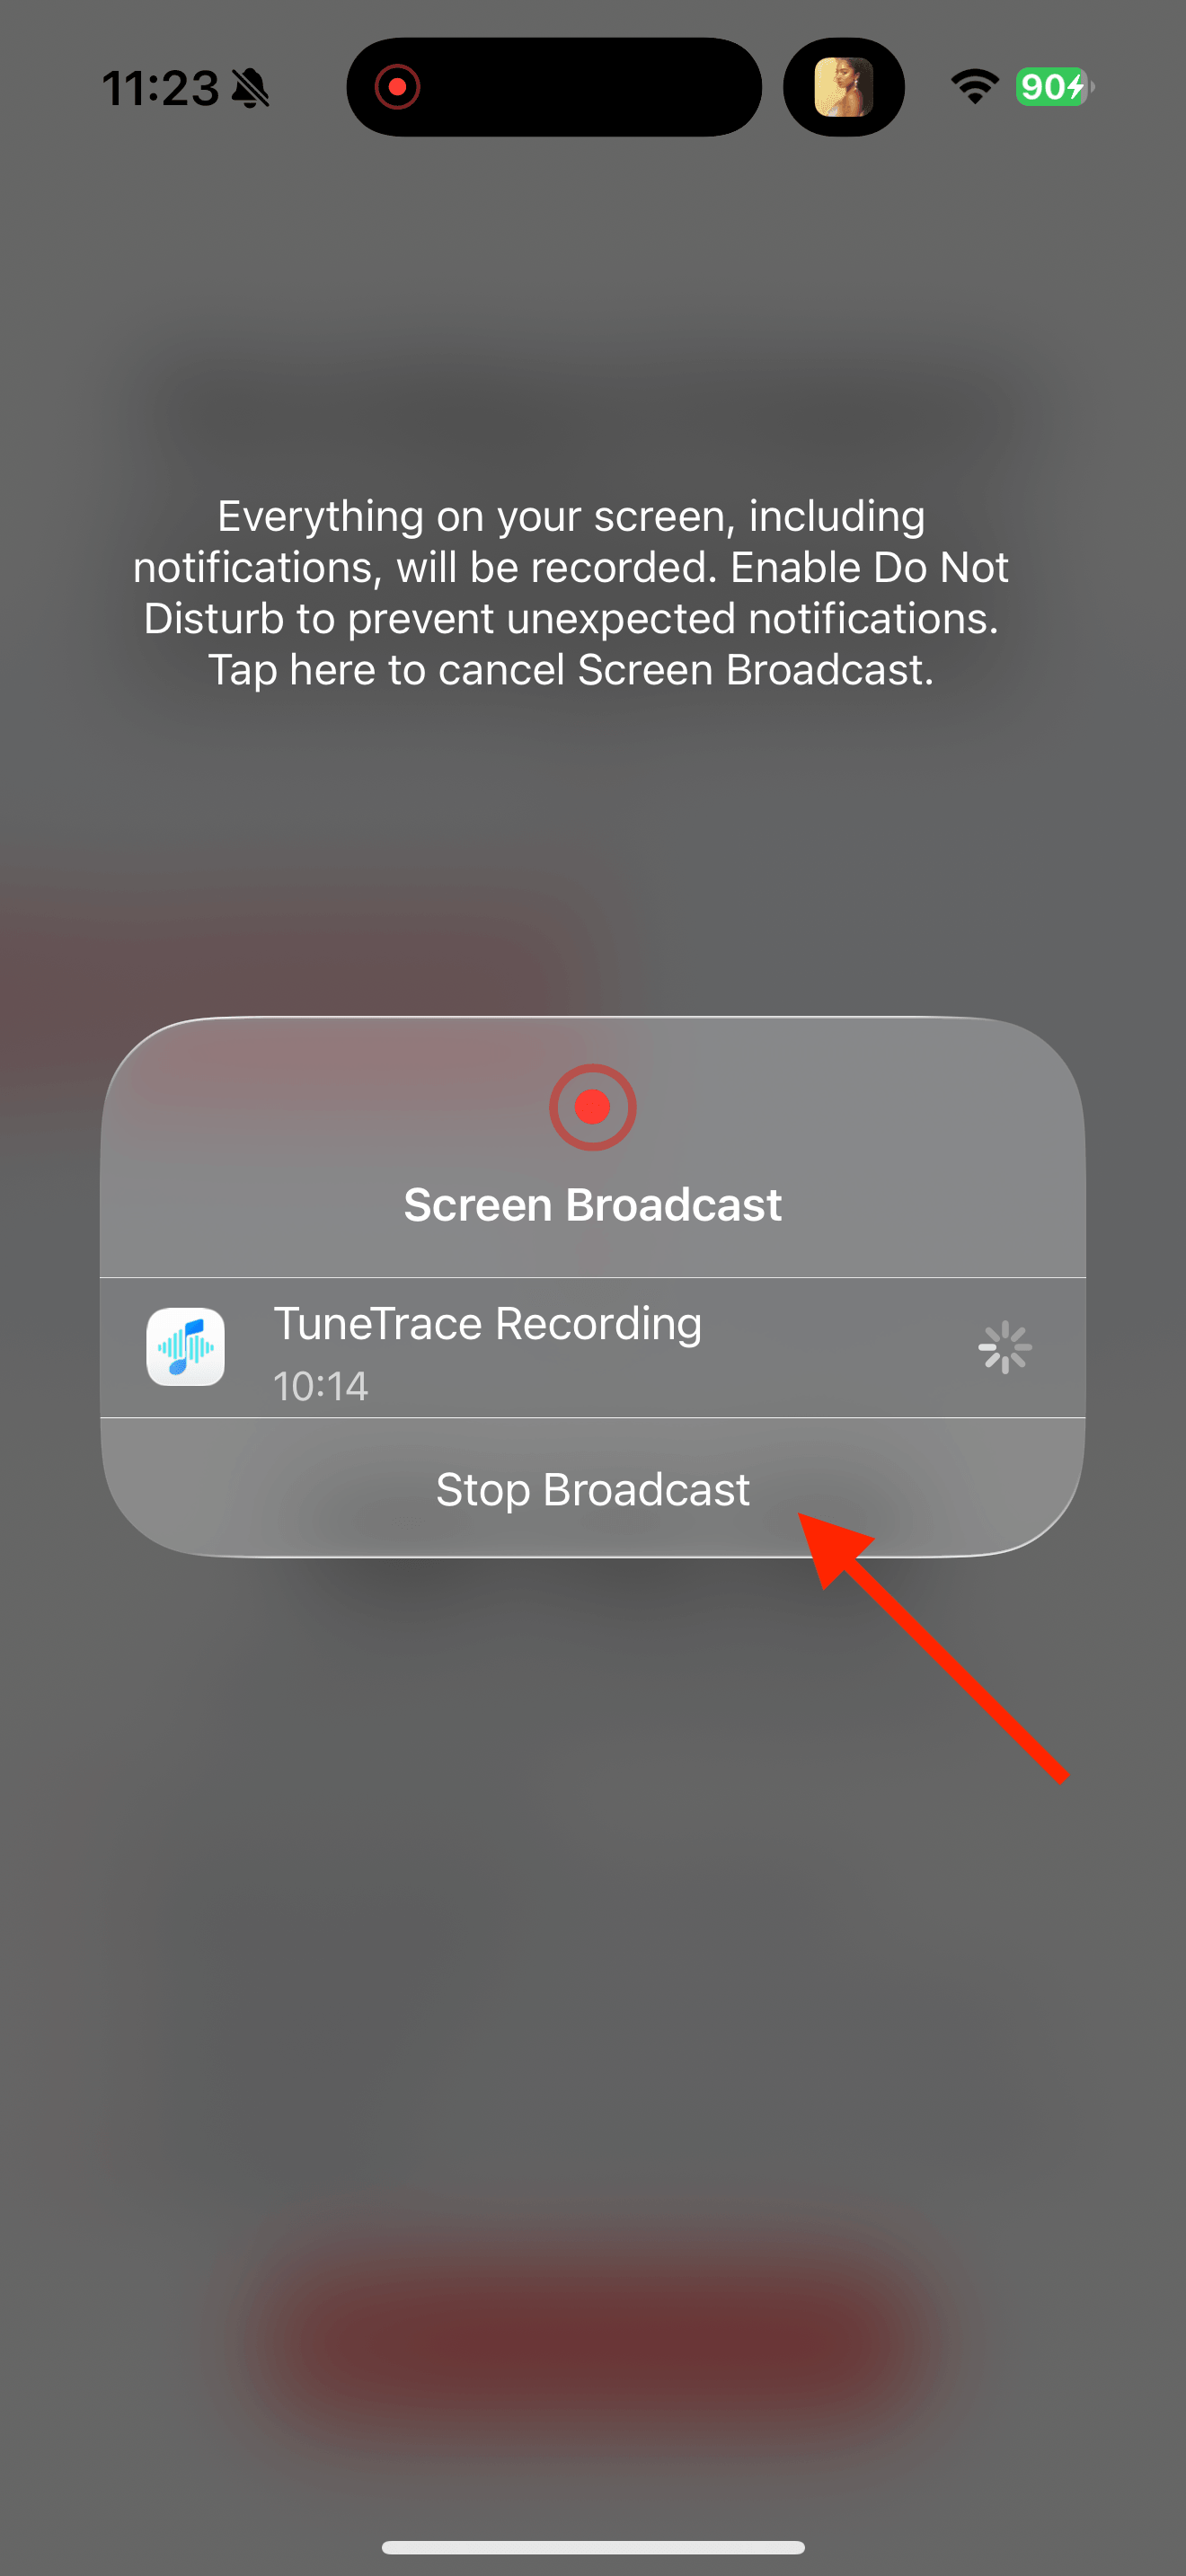
In the pop-up, tap Stop Broadcast.
Identify and save
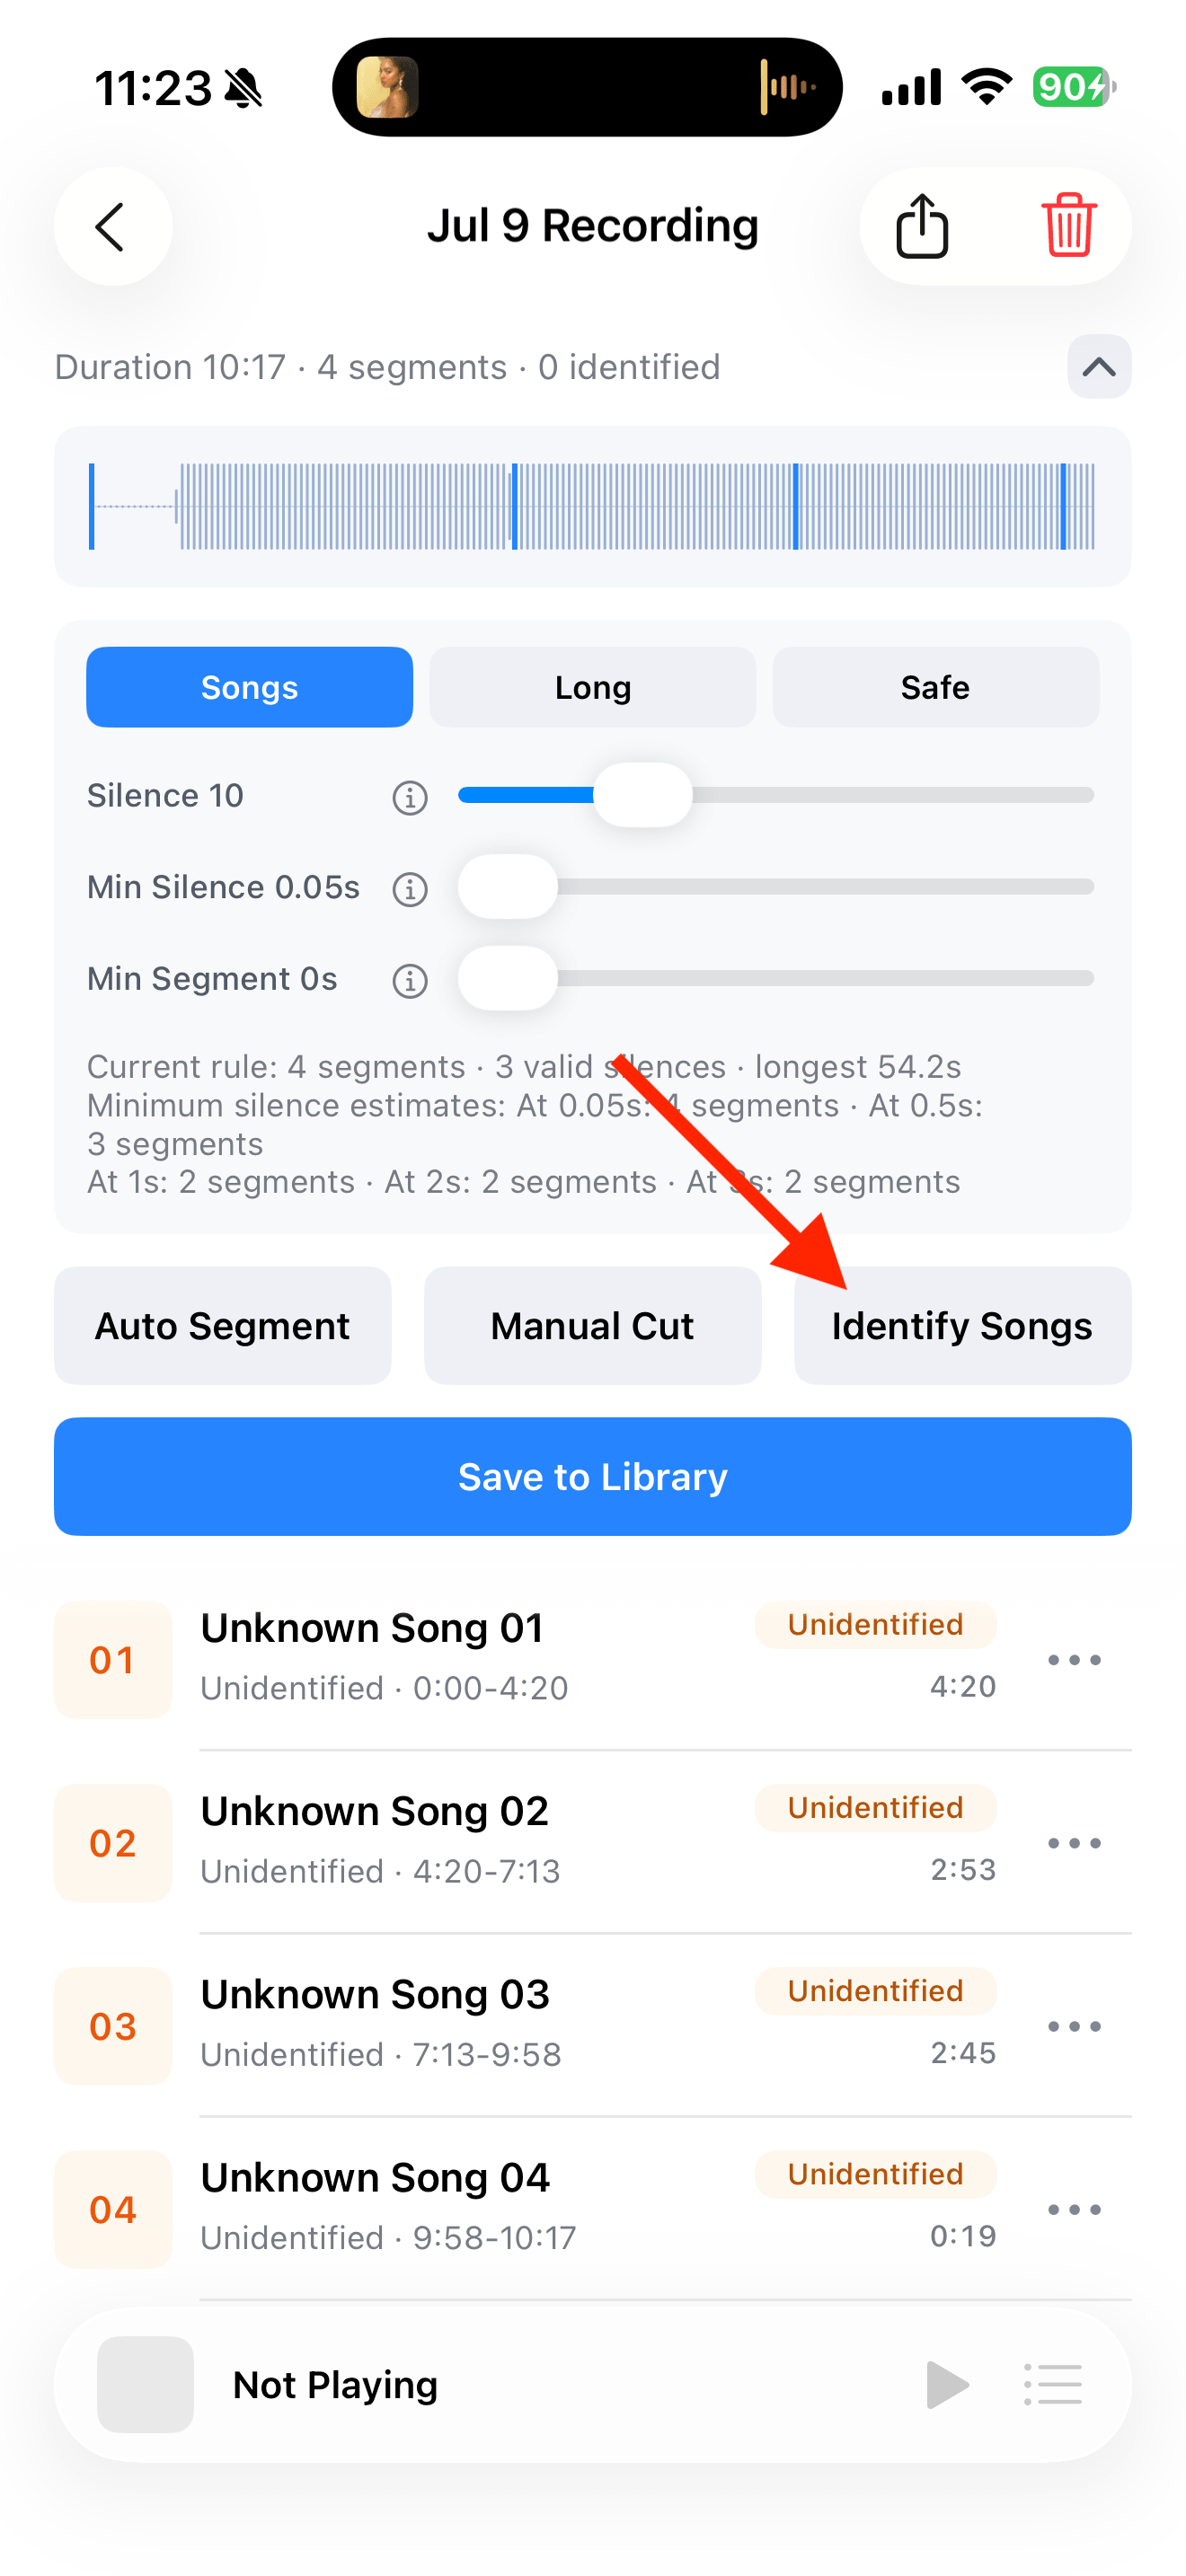
09—13- Step 09
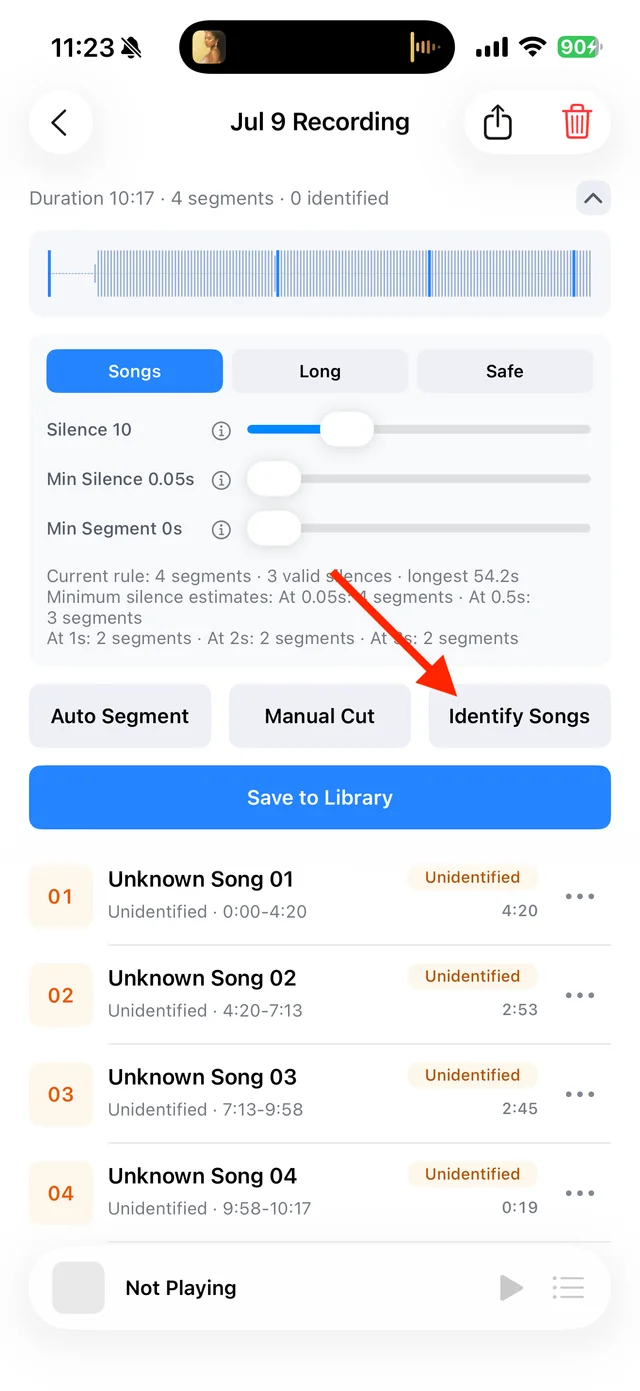
Tap Identify Songs. TuneTrace will split the recording automatically, and you can adjust the cuts by hand if needed.
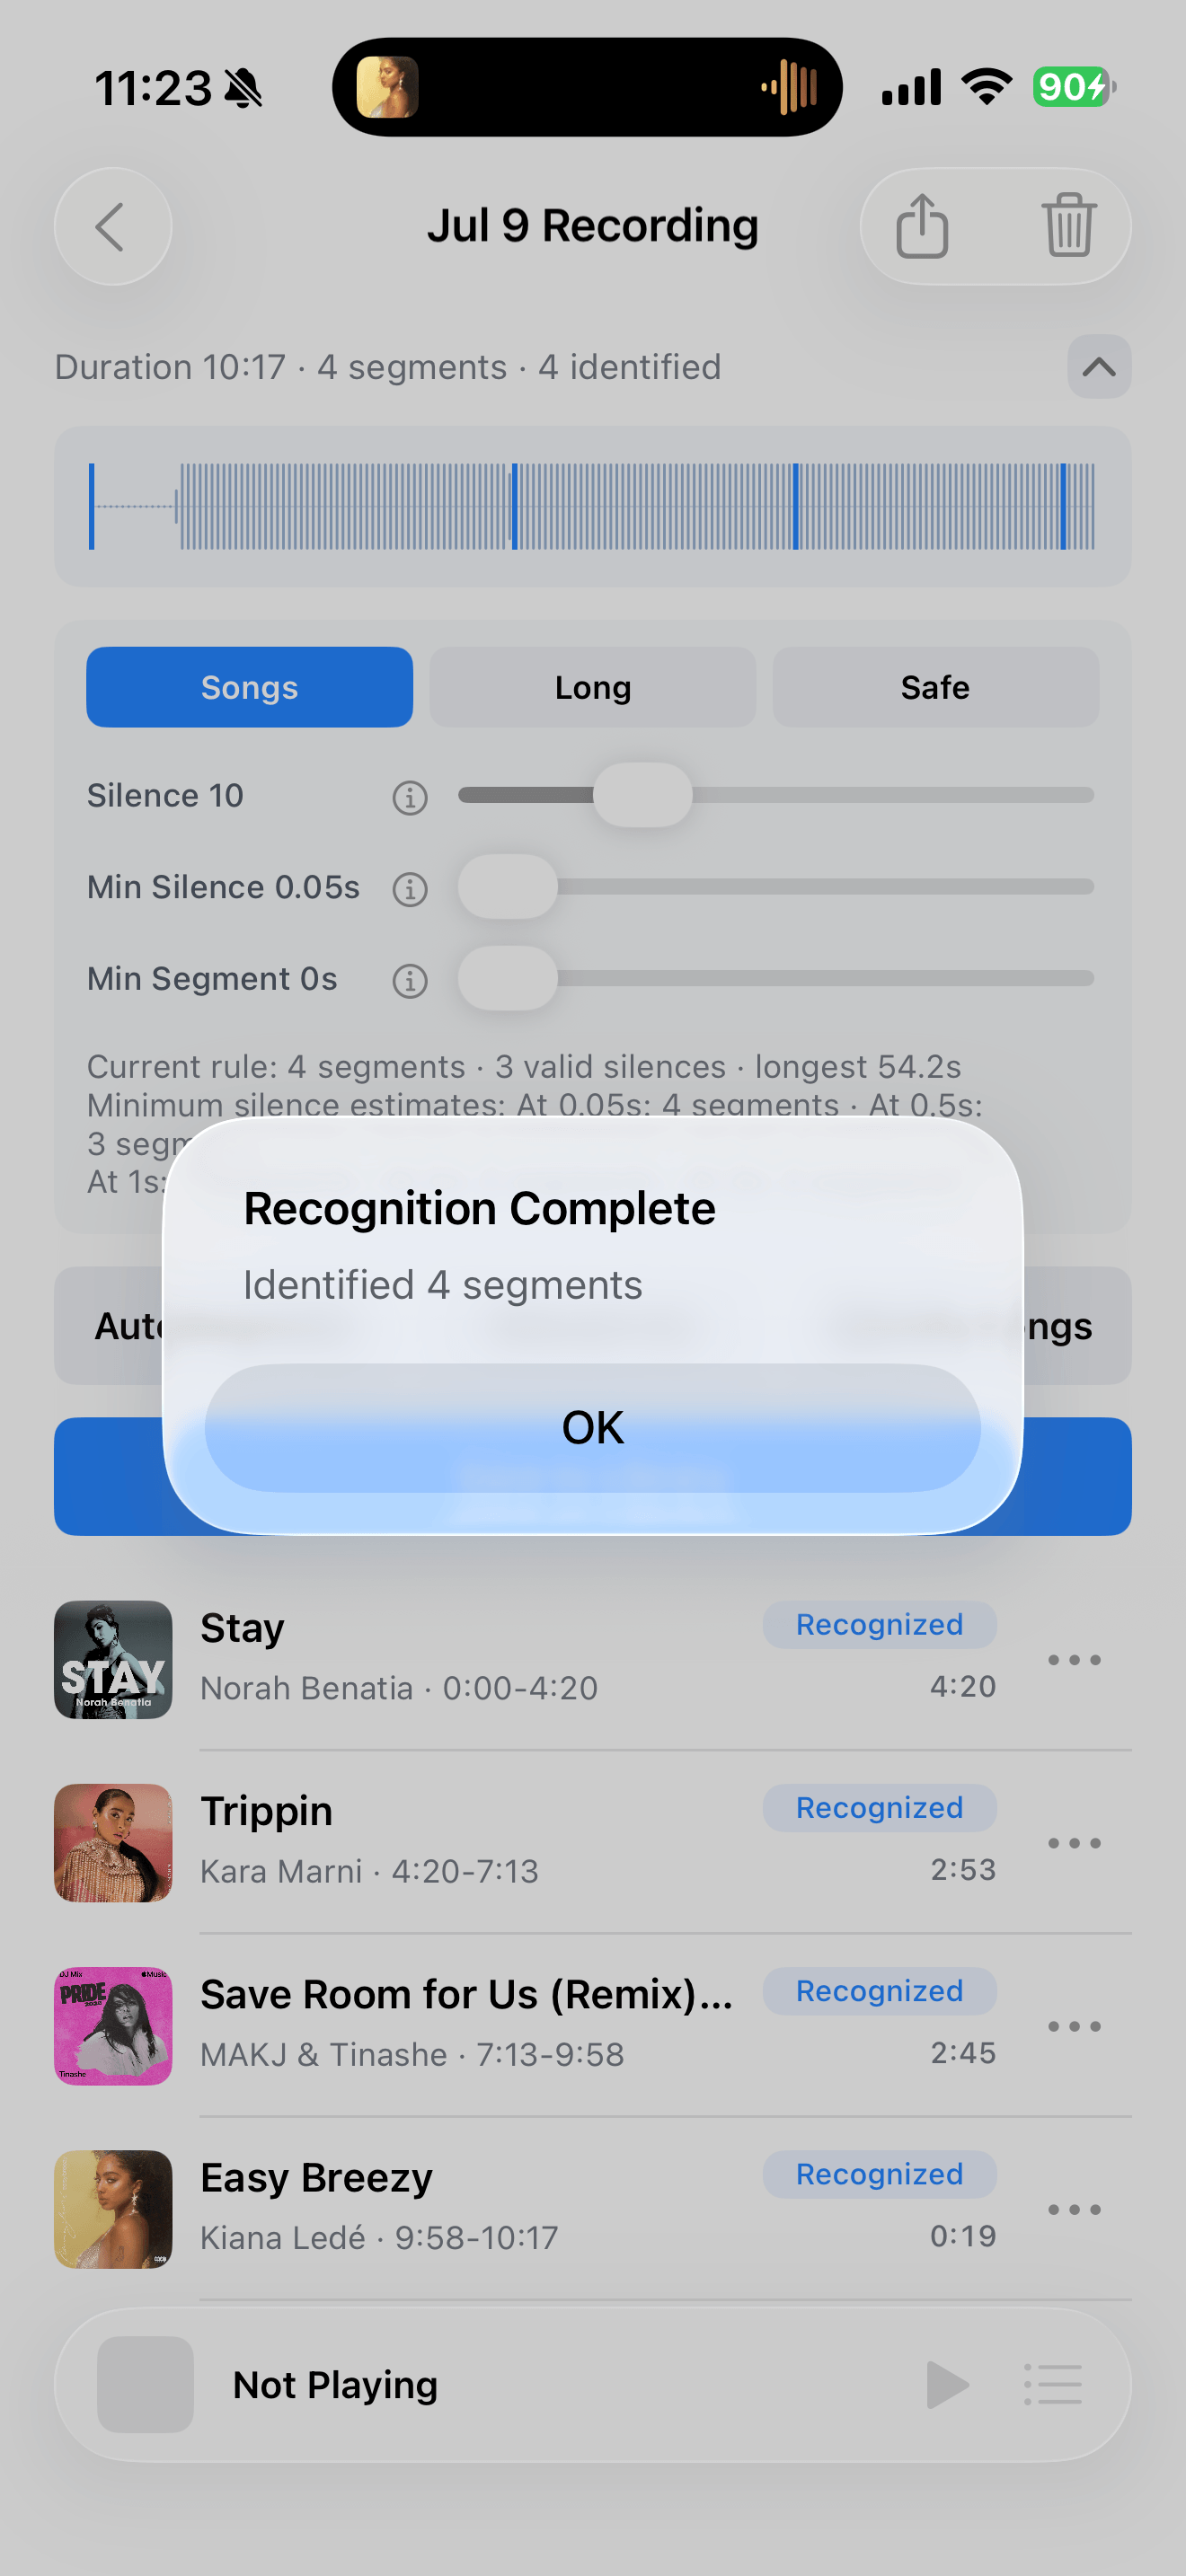
- Step 10
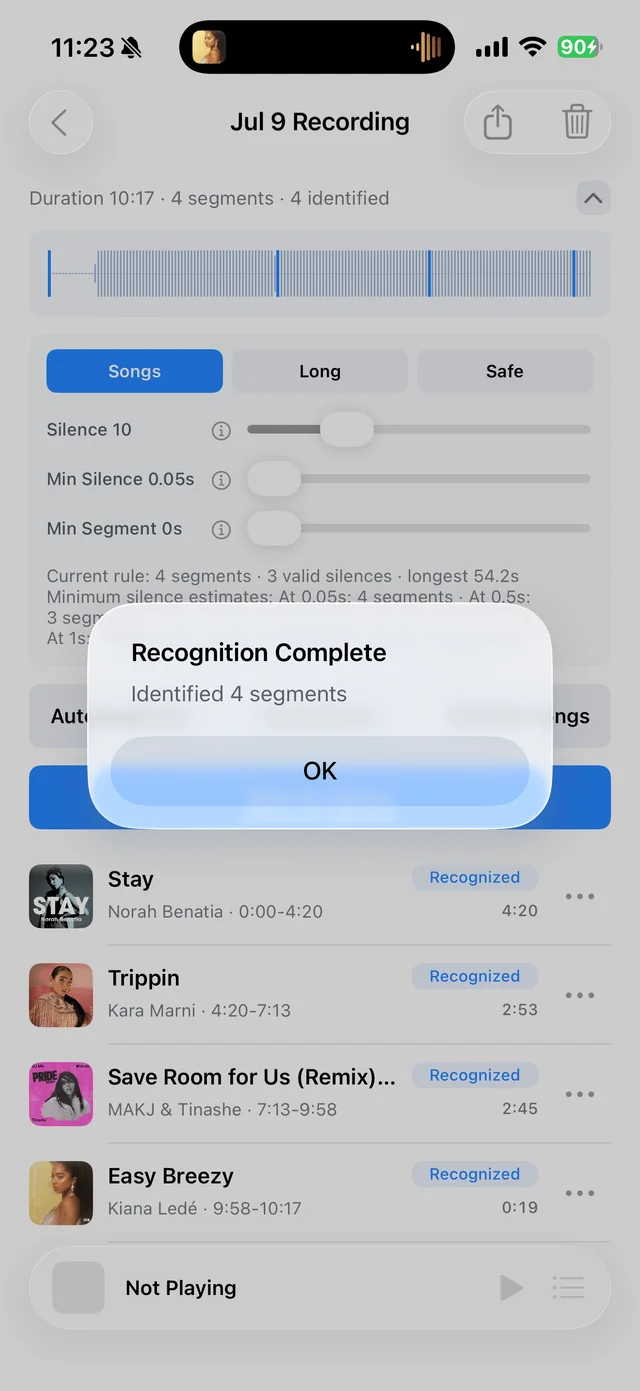
When identification finishes, check the title, artist, and cover.
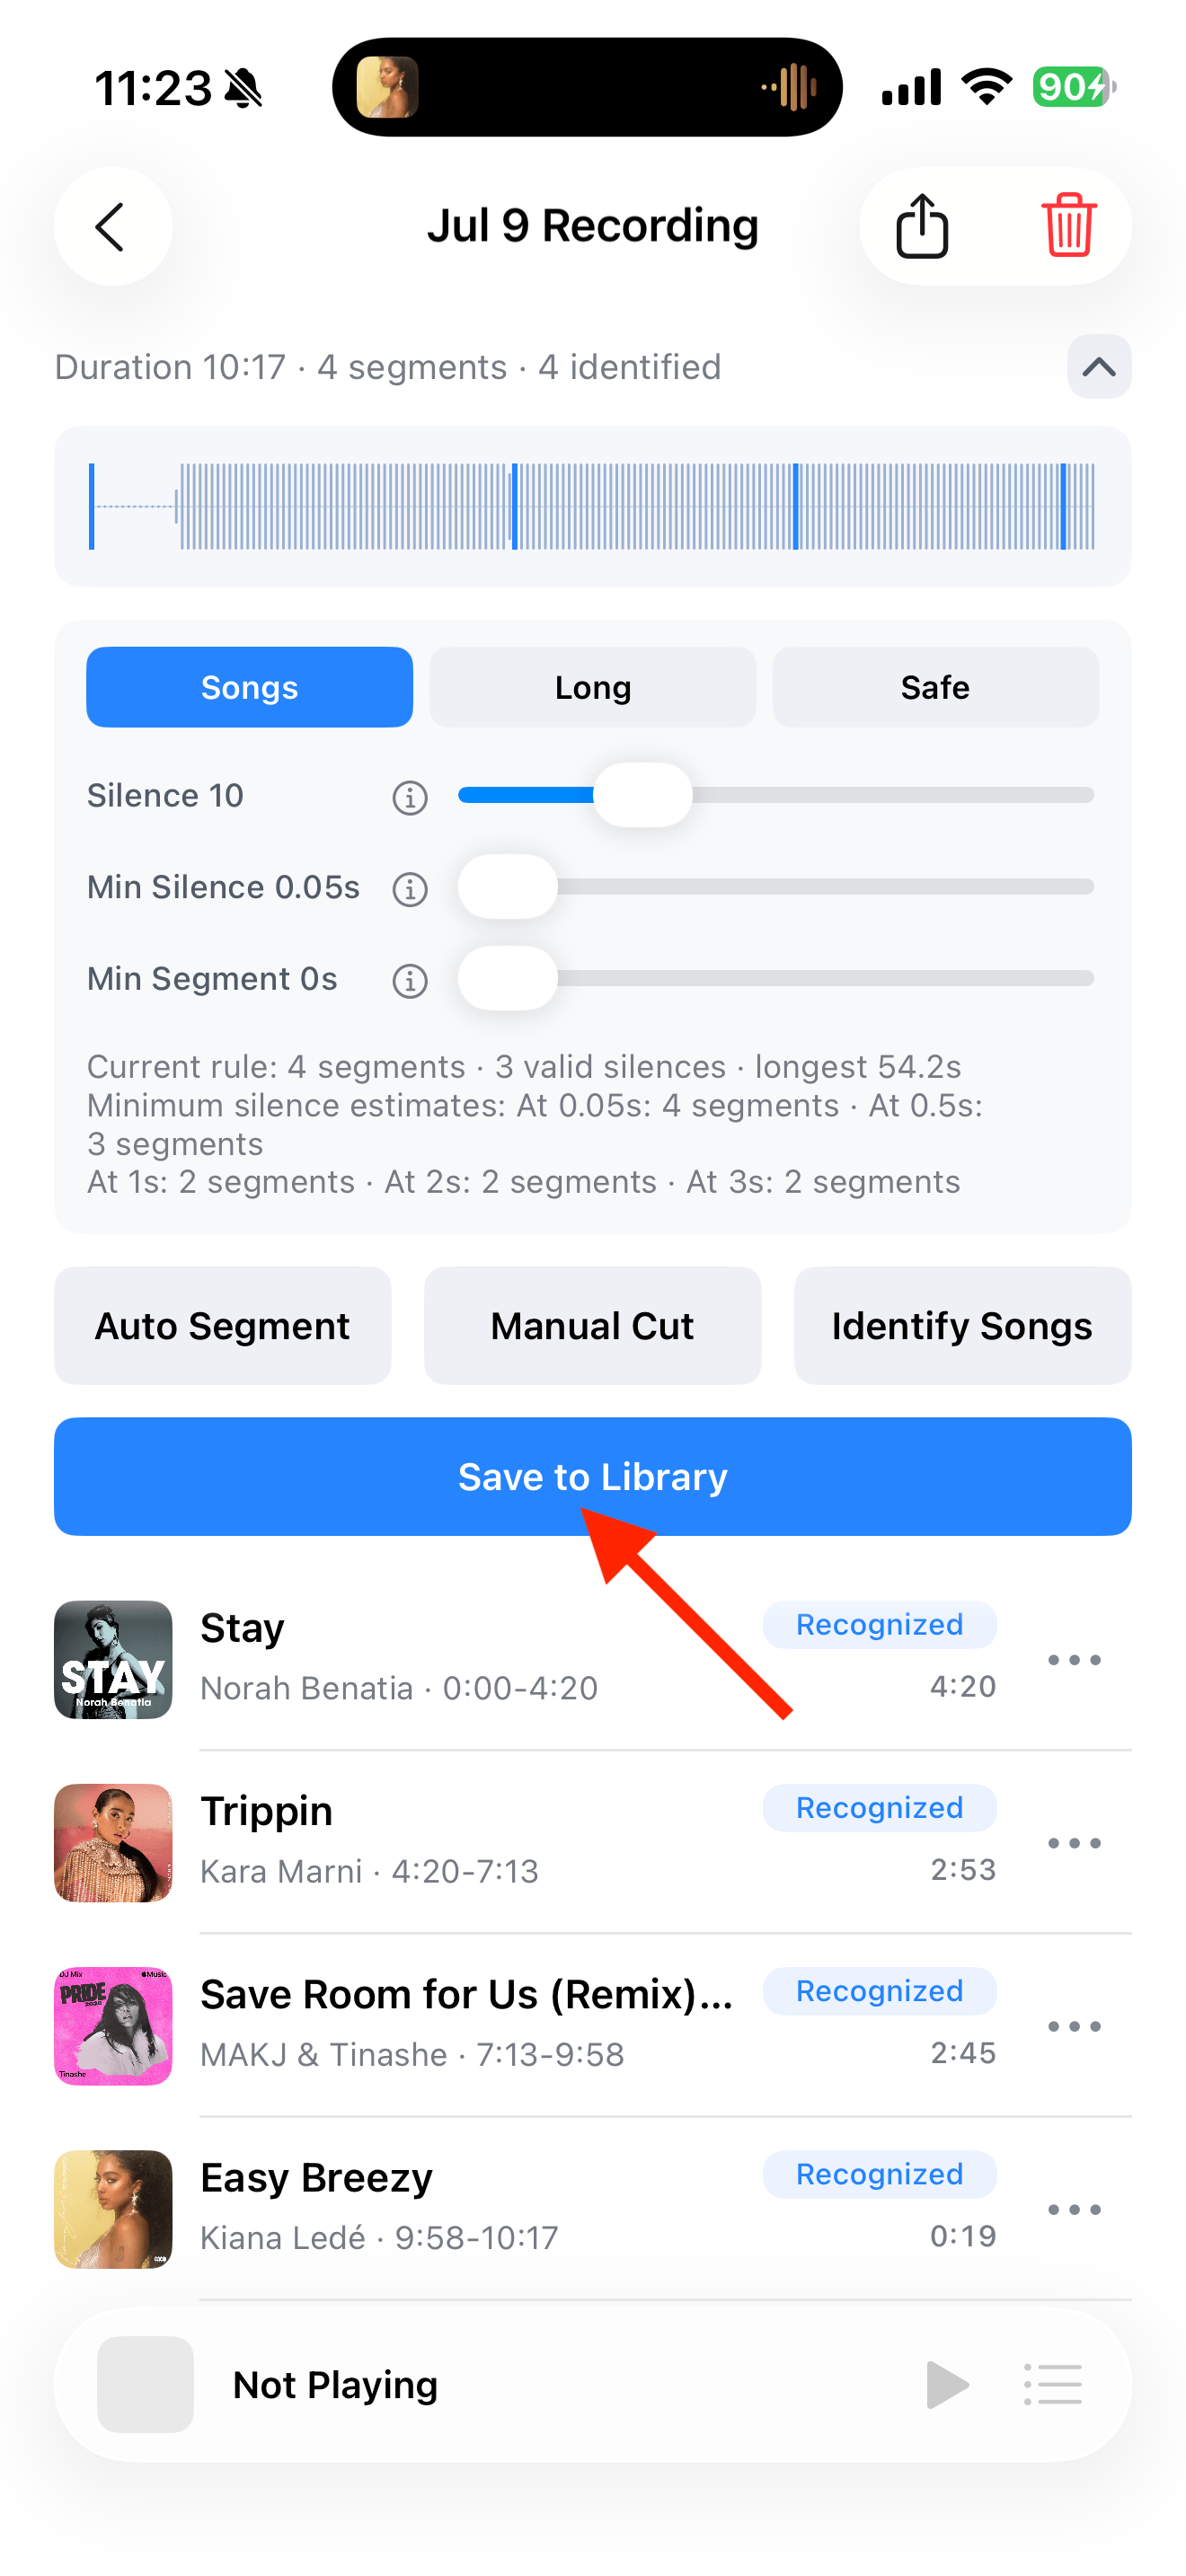
- Step 11
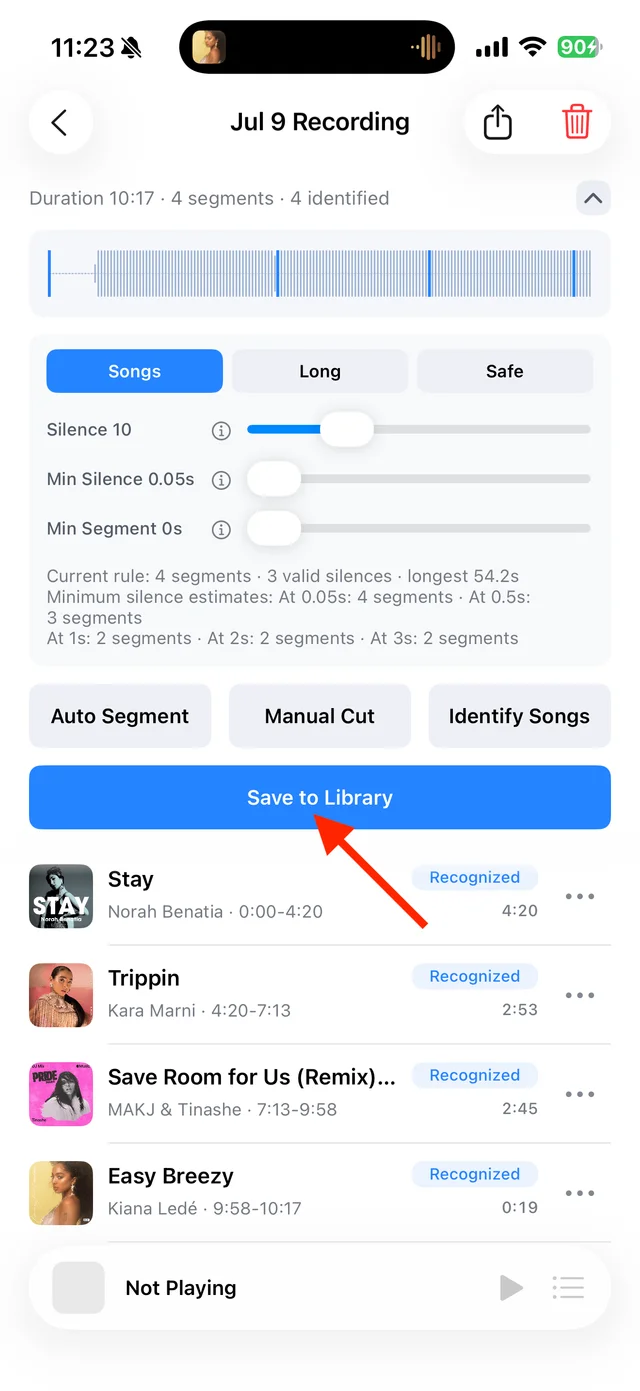
If everything looks right, tap Save to Library. If not, use the song's more button to edit it.
- Step 12
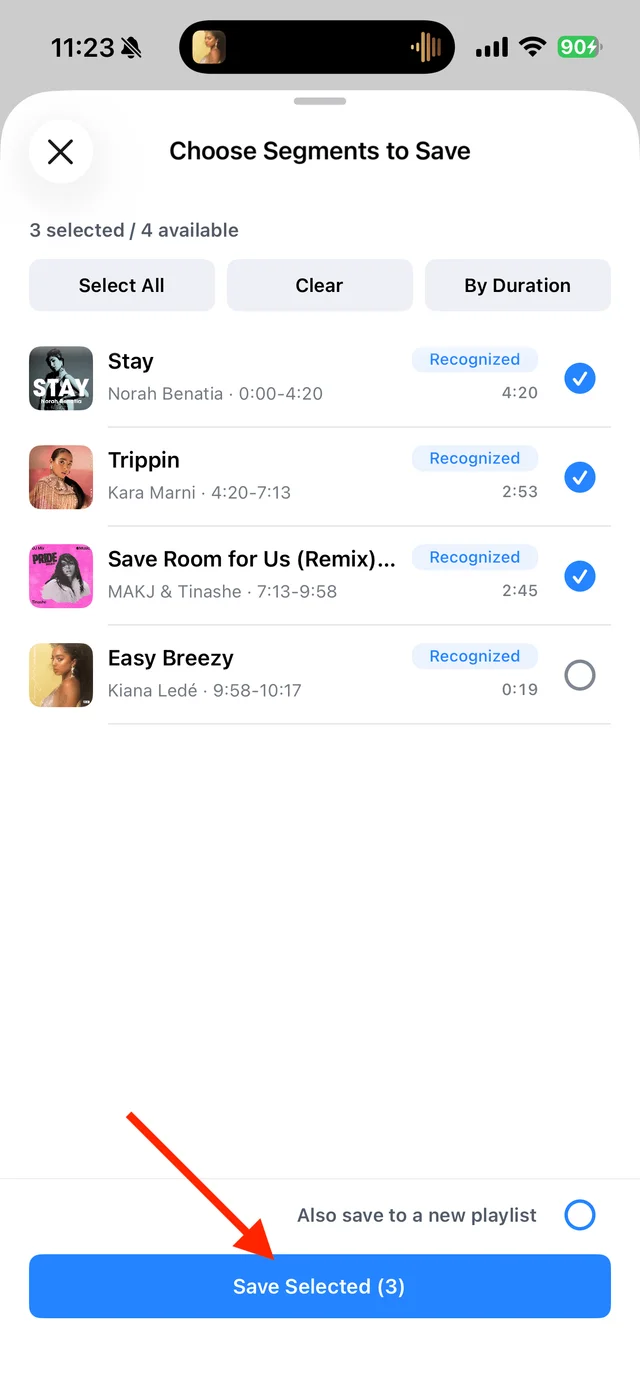
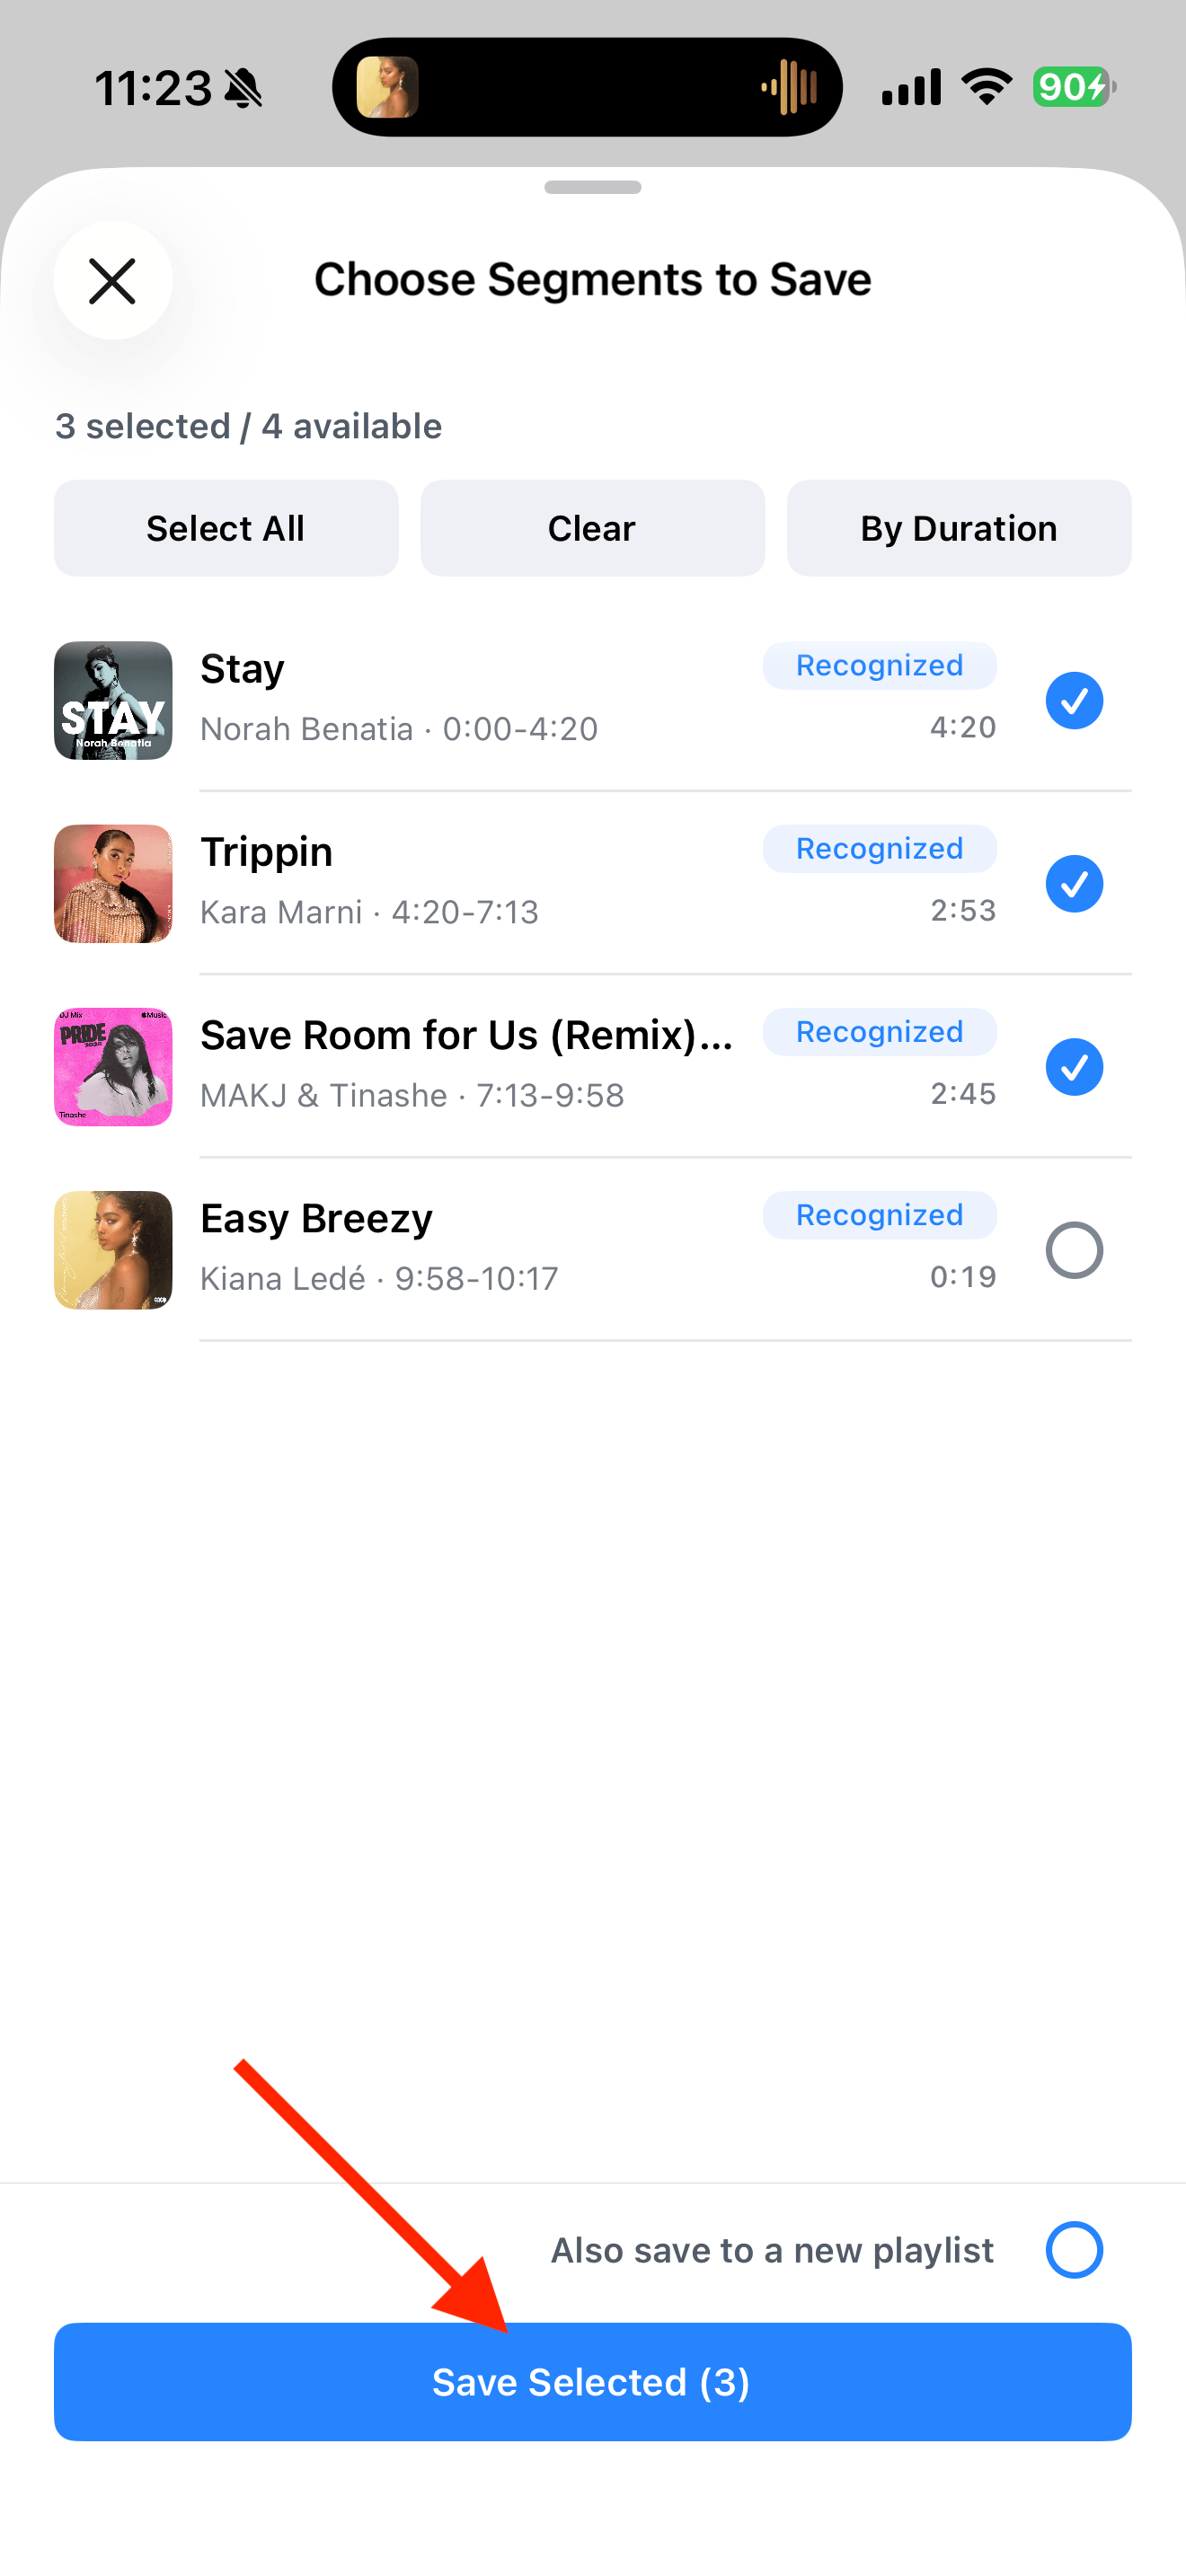
Select the songs you want to keep, then save.
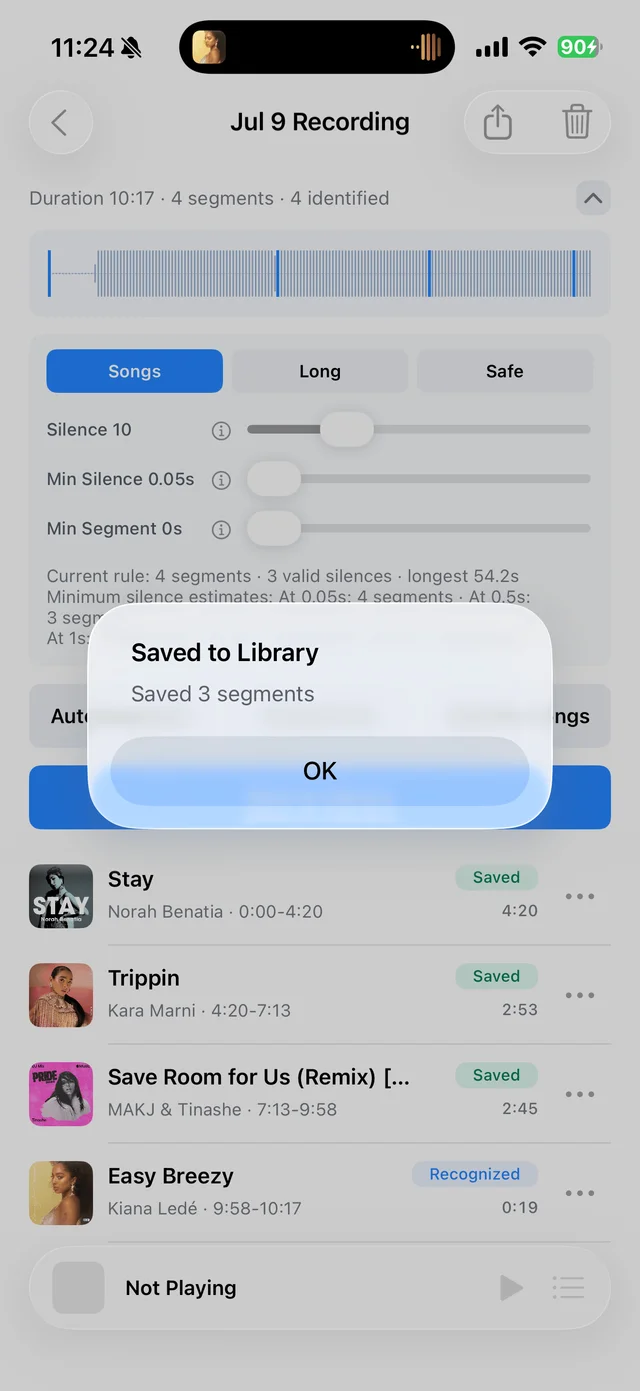
- Step 13
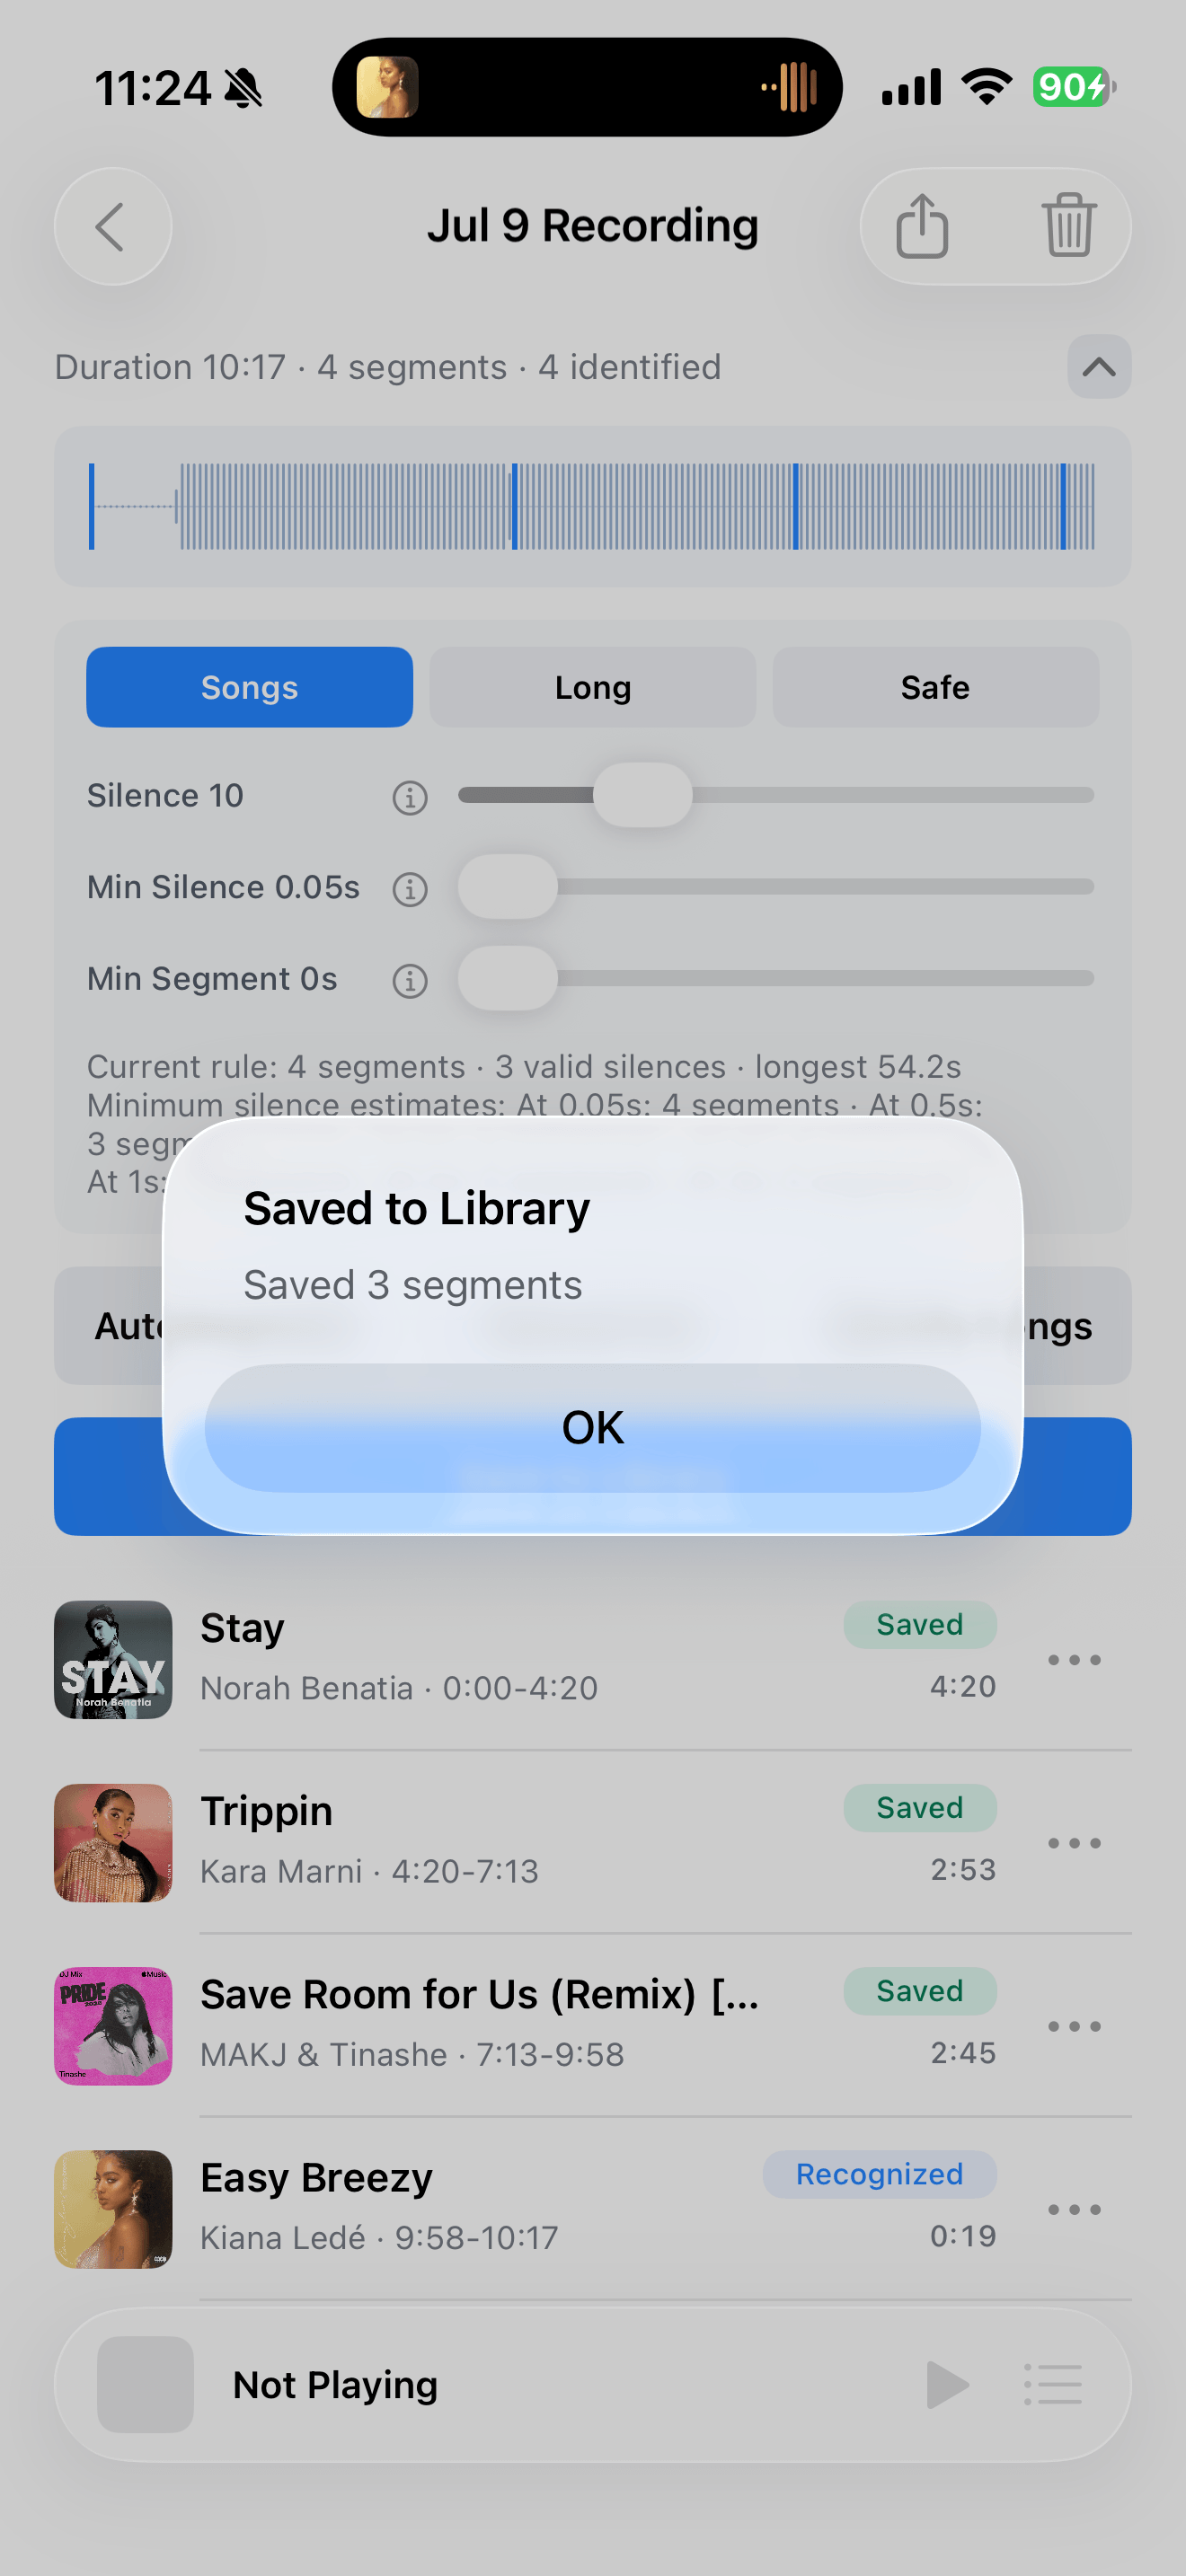
Once you see Saved, those songs are in your library.
Listen from your library
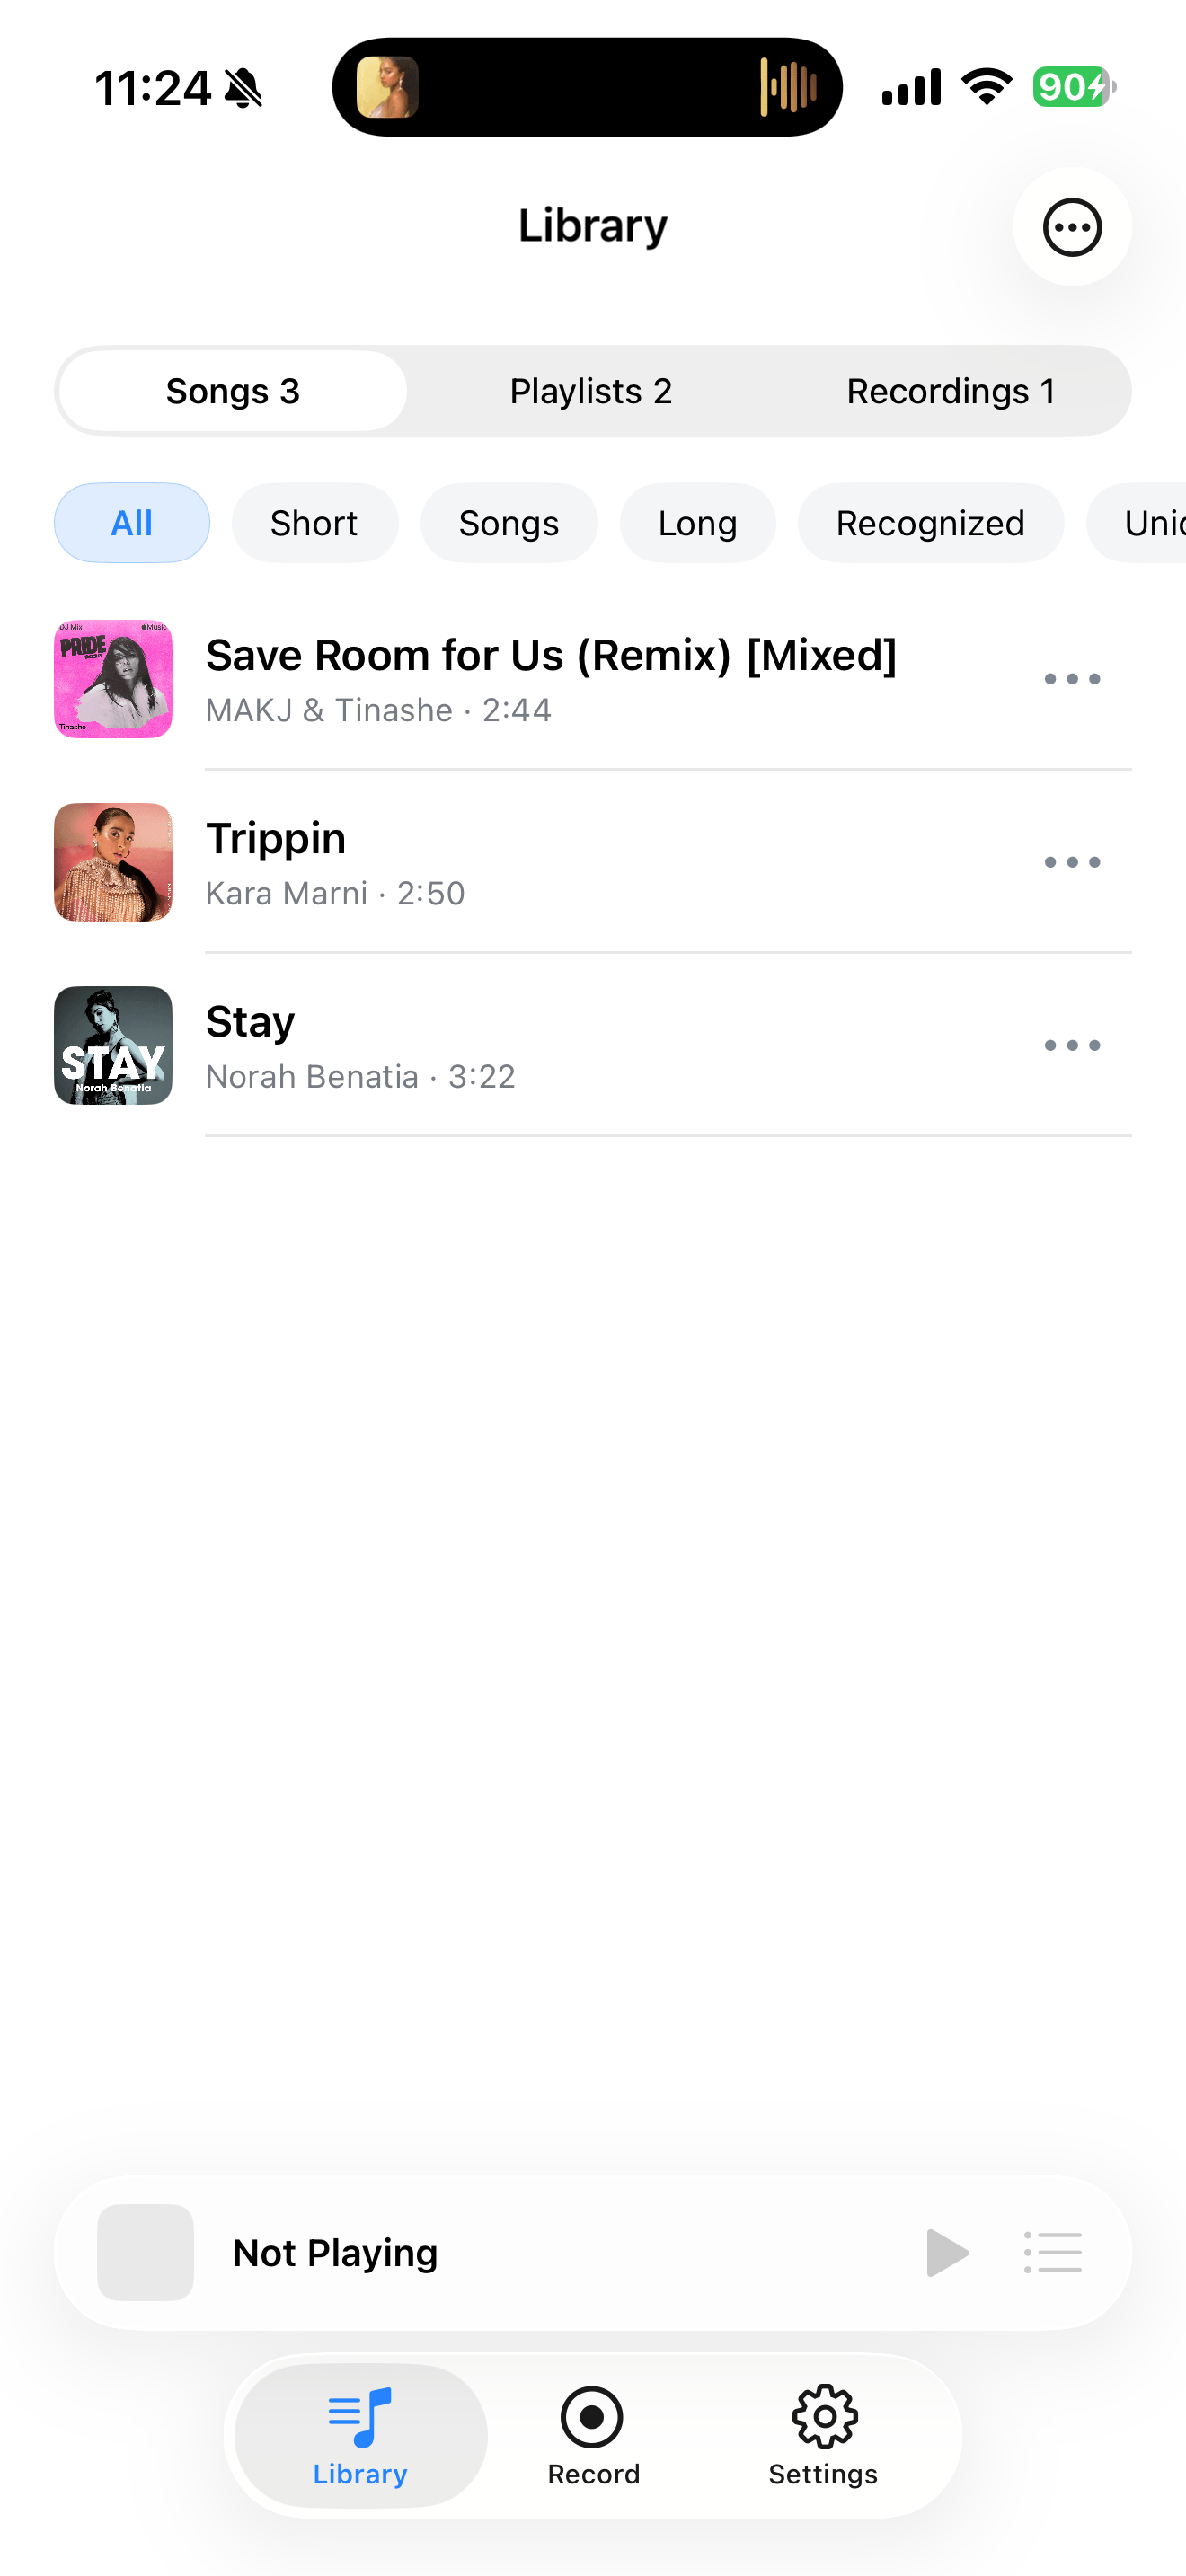
14—15- Step 14
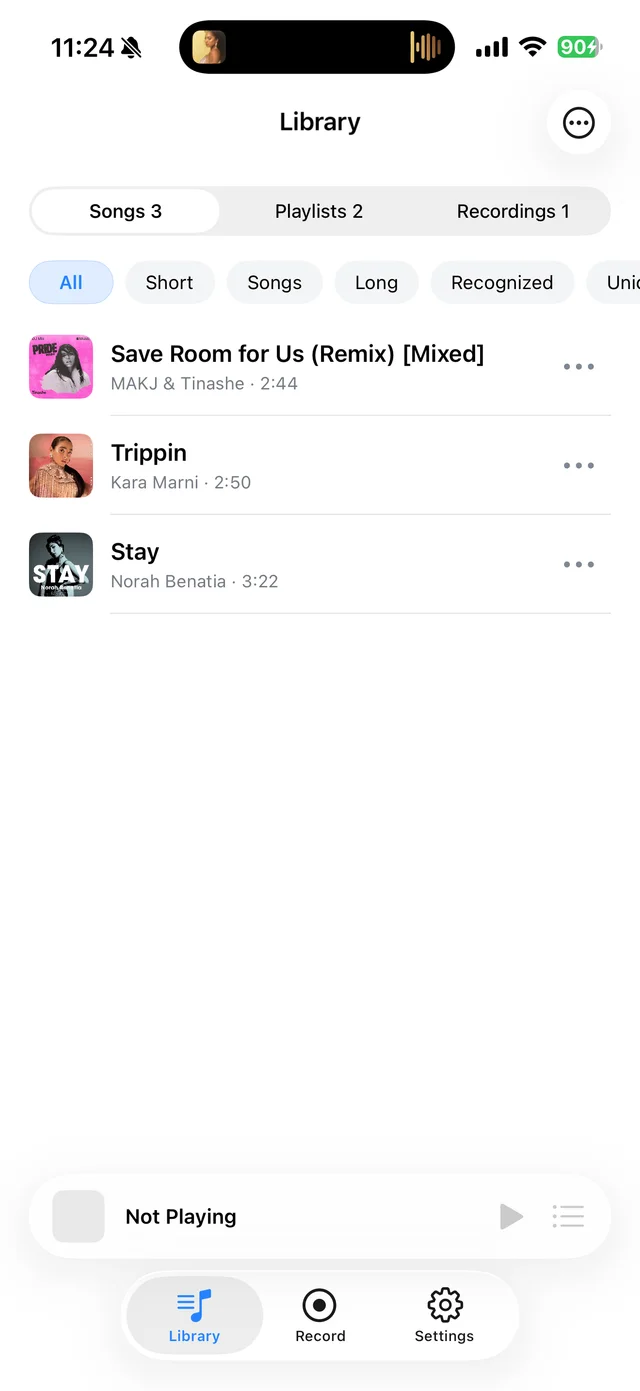
Go back to Library to find the songs you just saved.
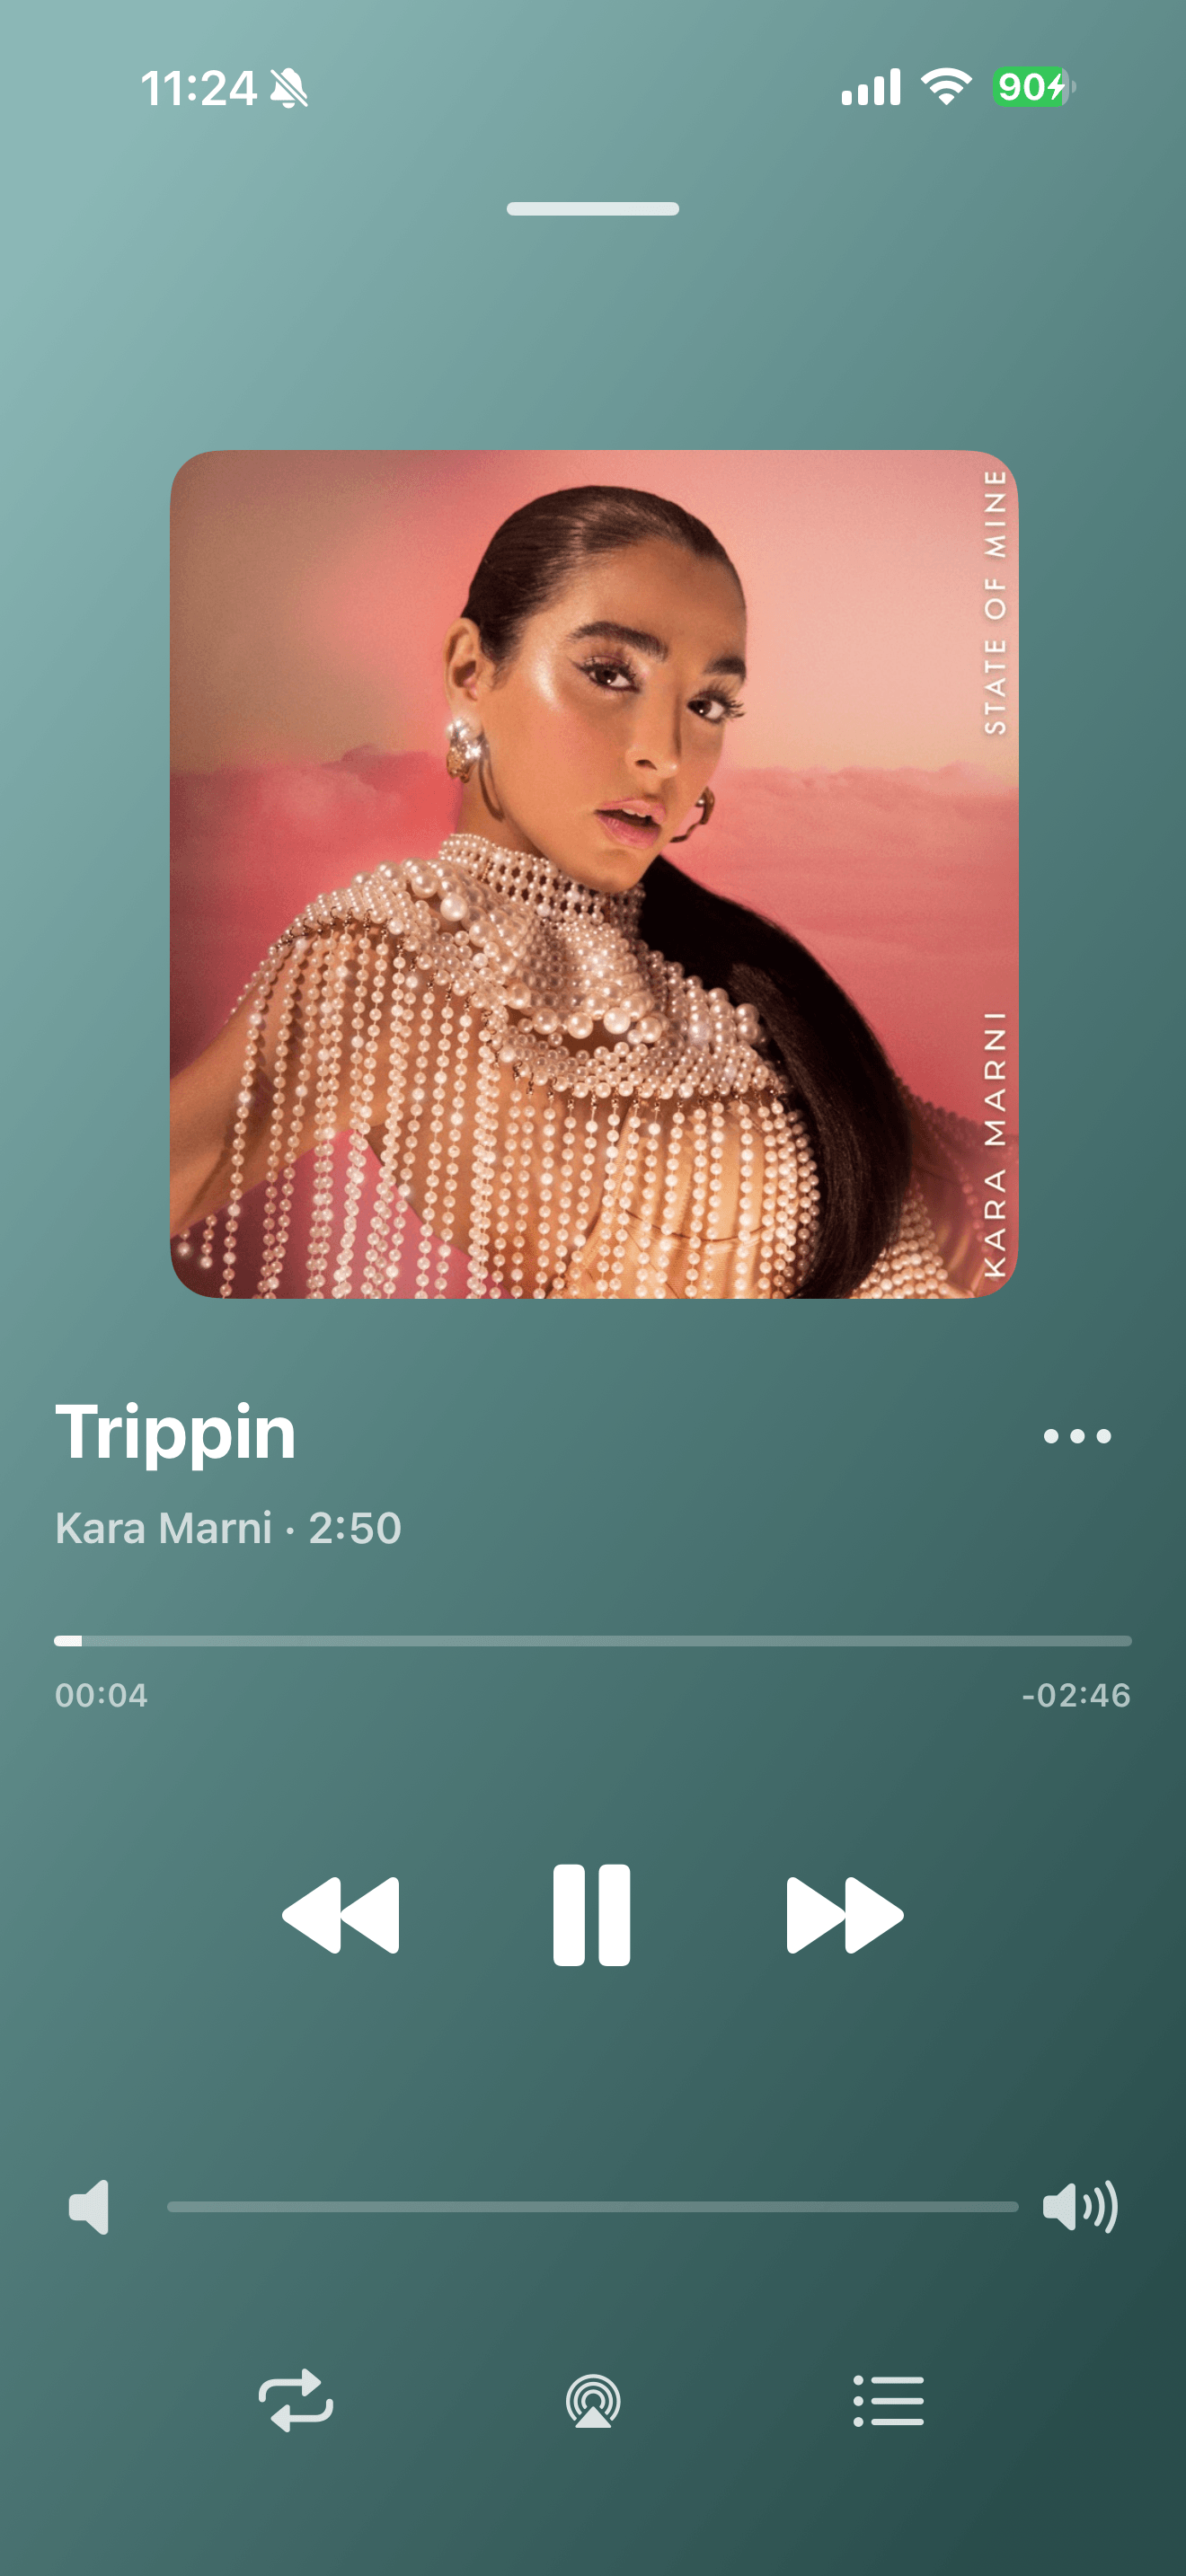
- Step 15
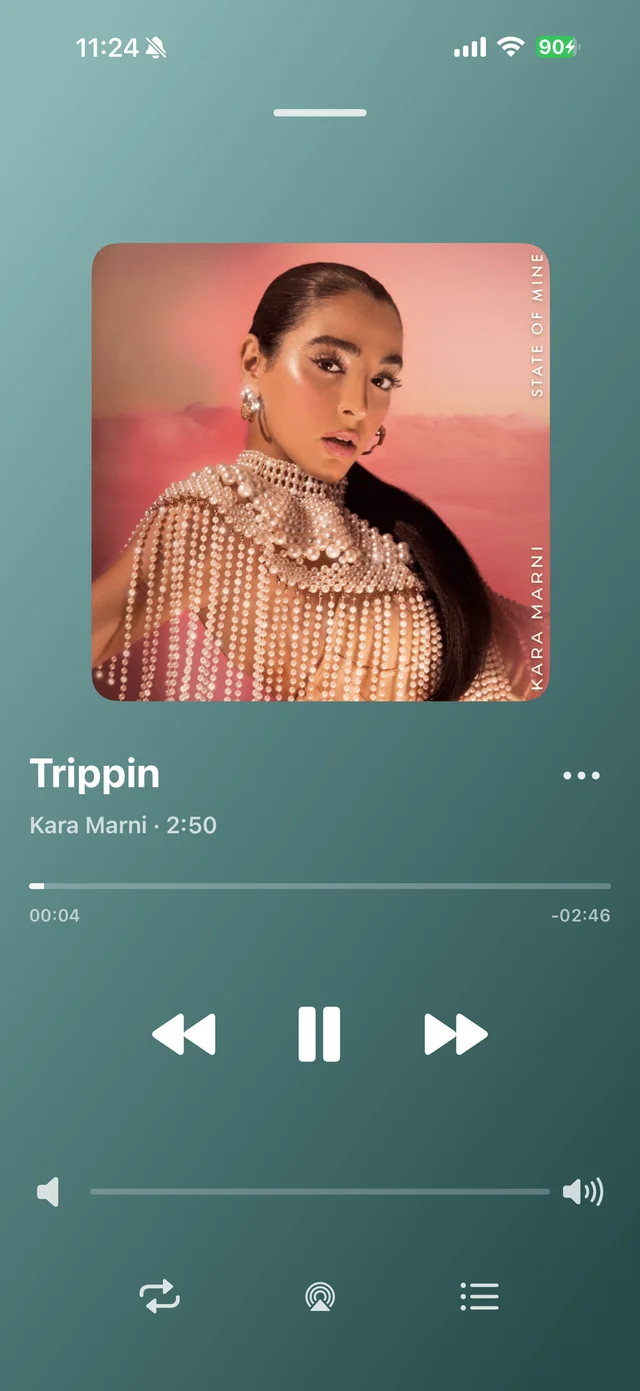
Play your saved songs from your local library, even offline.
TUNETRACE